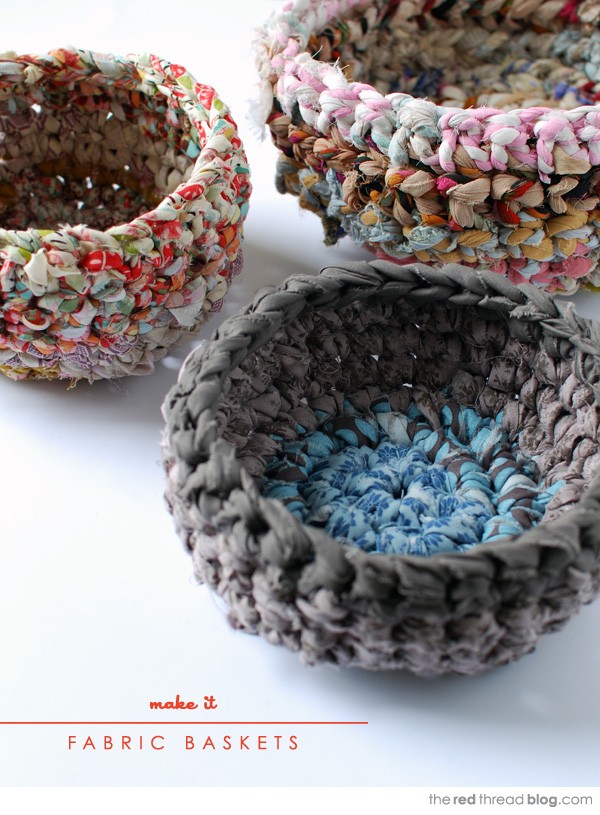
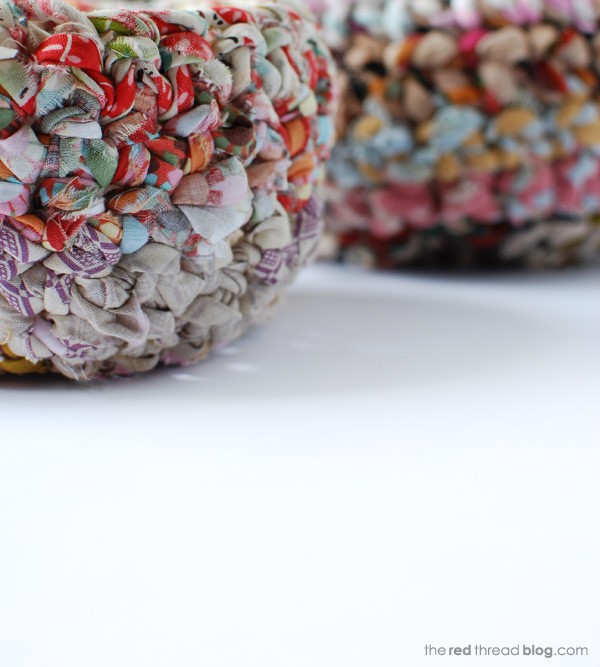
Learn to crochet. Make lovely crochet fabric baskets. Use up fabric scraps and upcycle thrifted sheets and tablecloths. Make your own rag rope. It’s all here!
I love making these fabric baskets – there’s only one crochet stitch to learn and it’s a great craft to pick up when you have a spare minute. Perfect for in front of the TV or in the car when you’re waiting for the kids’ sport to finish. The chunky fabric yarn also means the baskets are fast to make. If you haven’t done any crochet before this is a good place to start and you get impressive and practical results!
Let’s get started…
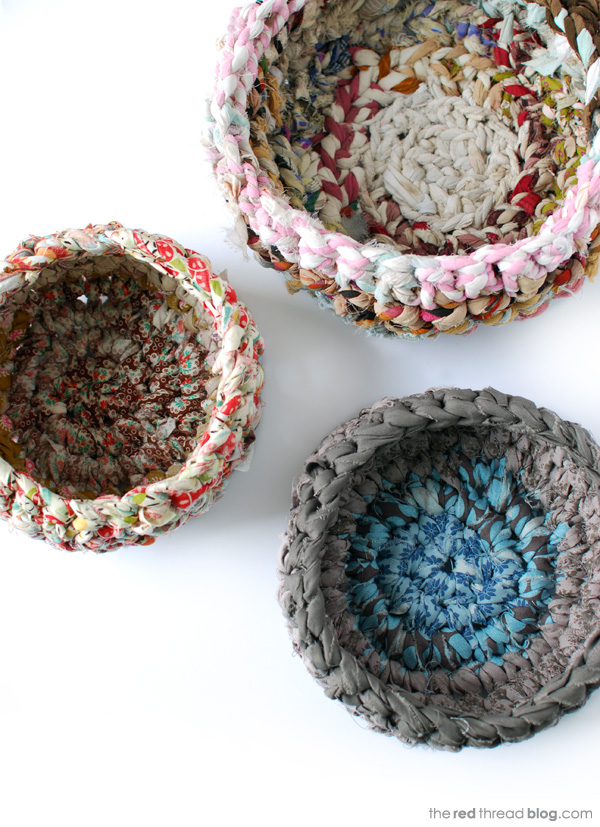
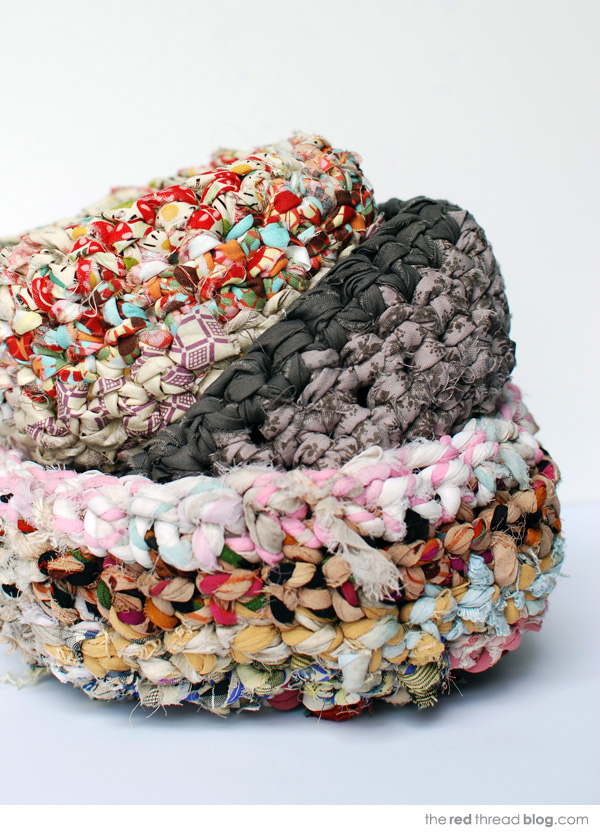
I’ve made baskets using fabric yarn, rag rope that I’ve made and and rag rope that’s available for purchase. The baskets in the photos below are made from rag rope that I purchased. Rag rope makes a thicker and chunkier basket, although both rag rope and fabric yarn baskets are really sturdy. If you don’t have fabric to make your own rag rope – or you can’t be bothered – the bought version is great. A spool of it will make a large basket measuring about 32 x 13 cm (12.5 x 5 inches) like the one below.
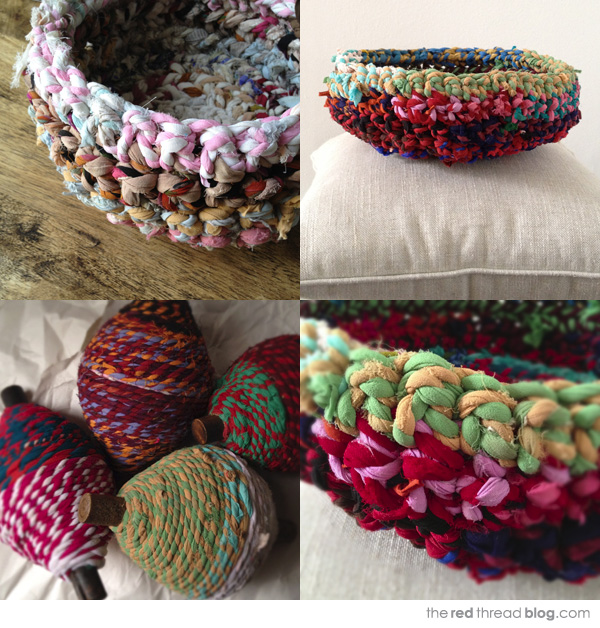
What you’ll need
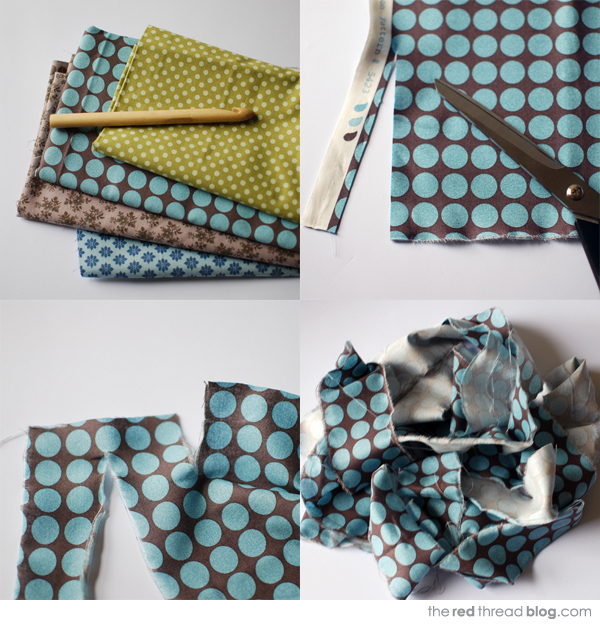
Firstly gather your supplies. You’ll need a 12mm* crochet hook, scissors and cotton fabric. And something to wind the fabric yarn onto – I used a thick piece of dowel, but a piece of heavy cardboard would also be good.
*As far as I can see US size crochet hooks seem to jump between the equivalent of 12mm and 15mm with nothing in between. In US sizes I’d try a N/P – 15, and in the UK a 000.
The grey and blue basket – made from fabric yarn – measures 22 x 9 cm (8.5 x 3.5 inches) and I used a total of about 1.6 metres (62 inches) of quilting weight cotton fabric (x the full 42 inch width of the fabric). I used various sized pieces of different fabrics – whatever I had – to make up the 1.6 metres. For the blue and grey basket I made a deliberate choice with fabric placement, but for the others it was completely random.
Making rag rope and fabric yarn
To make both rag rope and fabric yarn you start in the same way.
Cut the selvedge edges off the fabric.
Now tear the fabric into one long strip. To do this, make a small cut on the edge of the fabric where the selvedge was. The cut should be about 4 cm (1.5 inches) in from the side and a couple of centimetres or an inch long. This is the fun bit: tear the fabric along the cut, stopping a couple of centimetres before you reach the end. Now make a cut in this end about 4 cm along from the previous cut – refer to the bottom left image below. Keep tearing the fabric end to end until you’ve done the whole piece – it will be like a big zig zag. Tear all your fabric pieces into strips in the same way.
For fabric yarn
Cut the fabric strips into a manageable size. I find four to five of the zig zag sections to be about right.
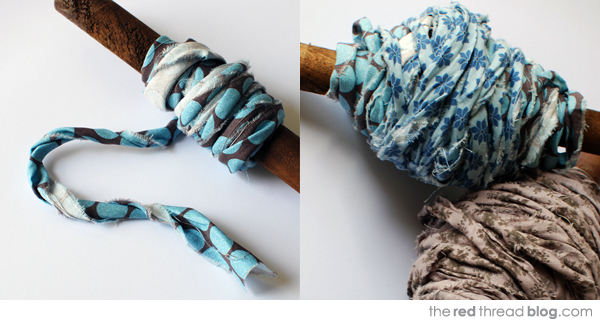
Tie one end to a door handle, and walk away holding the other end until the fabric strip is pulled out straight but not taught. You might need to do this in a hallway! Start twisting the fabric in one direction, and continue until the whole length of fabric is twisted. For fabric yarn it needs to be twisted enough to form a round shape, but not too tight – see the image below.
Starting with the end you’re holding, wind the yarn onto the dowel. Untie the other end, then get started on the next piece.
To make rag rope
If you can get someone to help you will be able to use a longer length of fabric which is great because the finished rage rope will be half the length of the fabric strip you start with.
Start by dampening the fabric strip. Don’t thoroughly wet it or you’ll be squeezing water all over the floor when you start twisting. Dampening the fabric before you start will help the rope stay solid when complete.
If you’re doing this on your own follow the instructions for the fabric yarn, but continue to twist until the fabric is really tightly twisted. It should be so tight that if you give it a bit of slack it will start twisting back on itself. If you have someone to help you, both grab an end and start twisting in opposite directions until it’s tightly twisted.
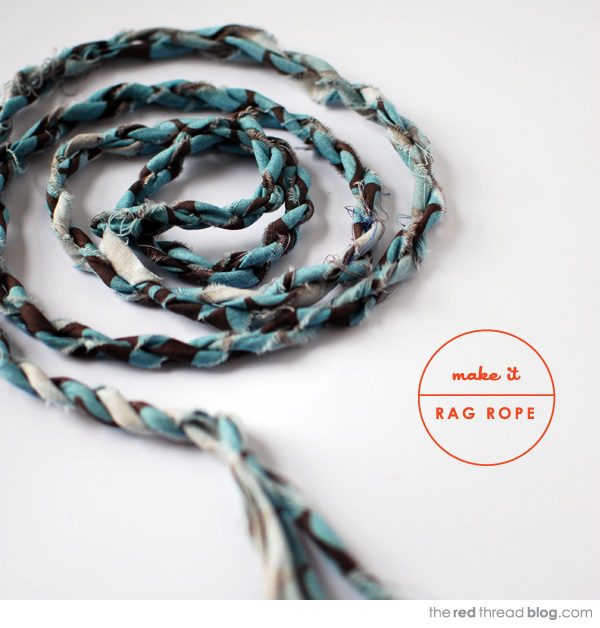
Now, fold the yarn in half. Sound tricky on your own? OK, hold the end of the yarn you’ve been twisting in your left hand and stretch that arm out to the side. Walk towards the center of the yarn keeping your left arm out and the yarn stretched. Grab the center point of the yarn in your right hand. Keeping the yarn stretched, walk towards the door handle and take hold of that end of the yarn with your left hand. I hope that makes sense?! Now allow the yarn to twist in on itself. And voila, rag rope! Wrap it onto the dowel, with the open end first so it doesn’t unravel. Note, you’ll need twice the amount of fabric to make a basket from rag rope, and it will be much chunkier than fabric yarn.
Crochet a fabric yarn basket
When I got half way through this tutorial I was kicking myself for not making a video tutorial… so many photos and instructions! If you get confused have a look online and I’m sure you can find some video instructions for basic crochet stitches.
The first thing to do is make a magic ring.
This is the trickiest part – once you get started crocheting in rounds you won’t believe how easy it is. So stick with it!
Leaving a tail of about 20 cm (8 inches) below your hand, bring the yarn up and between your thumb and first finger and hold it there.
Wrap the yarn over the top of three fingers, then underneath, and back over the top, so it forms an X on the top of your fingers (photo 1). Hold the yarn with your little finger.
Pass the crochet hook under the first part of the X and over the second part (photo 2).
With the hook facing down hook the yarn and pull it through (photo 3).
Bring the hook out and twist it so the hook part is now facing up (photo 4).
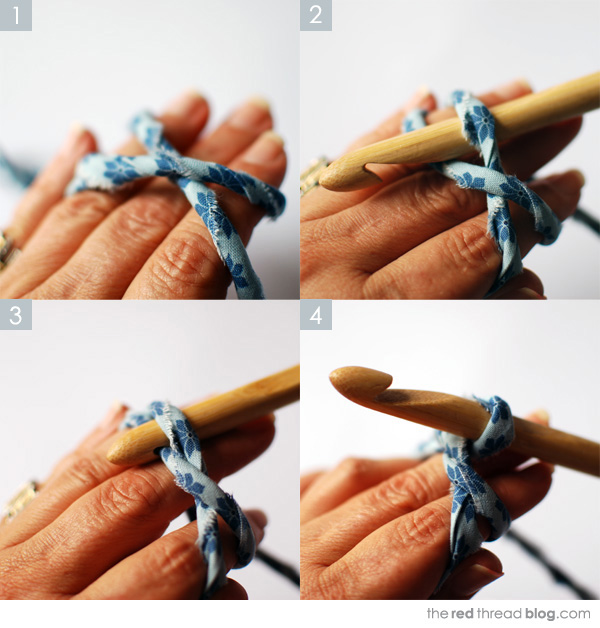
Slide the ring off your fingers (photo 5).
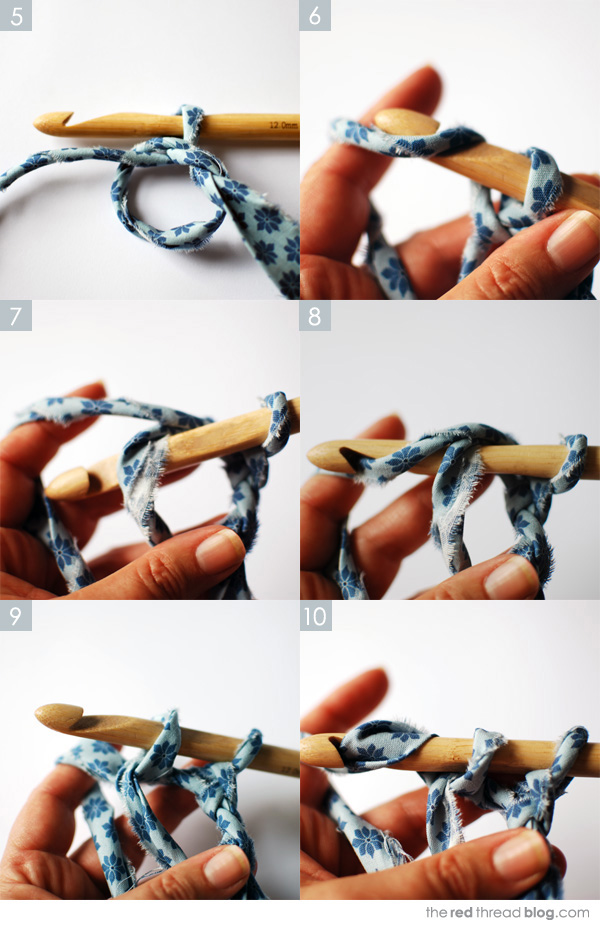
Pick up the ring in your left hand, holding the knot between your thumb and second finger, and the yarn over your first finger. Hold the crochet hook in your right hand like a pencil. Wrap the yarn over the hook (photo 6) and bring it though the loop. That’s a single chain stitch.
Now, this stitch is the only one you have to learn… Pass the hook through the center of the ring (photo 7) and under the yarn.
Bring the hook over the yarn and twist it so the hook is facing down (photo 7).
Hook the yarn and pull it through the center of the ring. You’ll now have two loops on the hook (photo 9).
Wrap the yarn around the hook (photo 10) and pull it though both loops. You’ll now have one loop on the hook and that completes the first stitch.
In US terminology that’s a single crochet – in the UK it’s called a double crochet. Just to confuse you! I’ll call it a single crochet in this tutorial.
Now we just repeat the single crochet stitch until we have eight of them on the magic ring.
Make sure your stitches aren’t too tight – see in the photos how the yarn isn’t tight around my hook? If the hook is too hard to pull through it means that you are pulling the yarn too tight around it. Make your stitches looser and it will make life much easier.
Remember… (starting from photo 7) Hook through the center of the ring. Yarn over. Pull through. Now there are two loops on the hook. Yarn over the hook and pull though both loops.
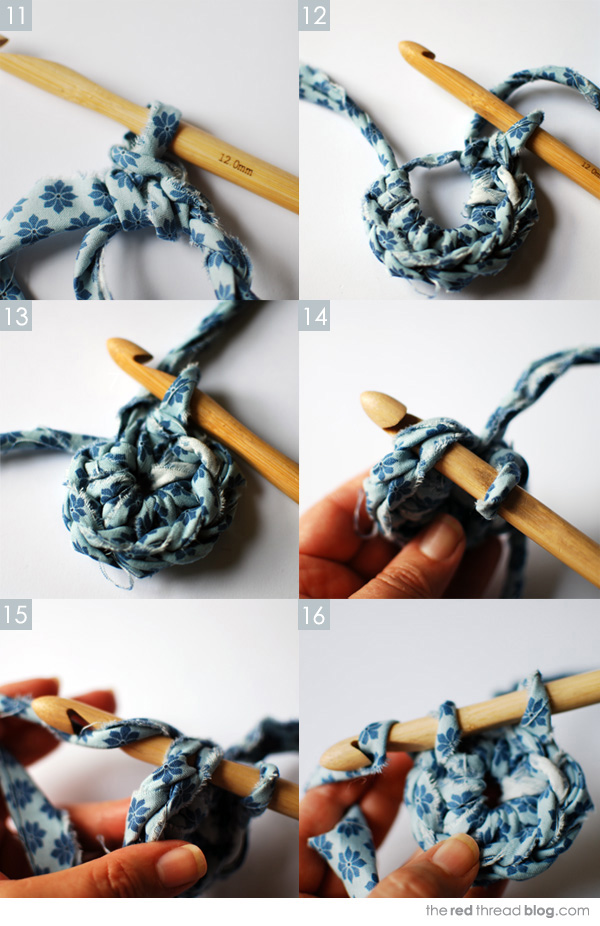
When you have eight stitches on the loop pull the tail to close the loop. In photo 12 the tail is on the left and the working yarn is on the right.
Starting with a magic ring is a bit tricky, but it’s the best way to make sure you don’t have a big hole in the middle of your basket. You can see the closed hole in photo 13.
Now onto the basket base
Insert the hook into the first stitch and do a single crochet stitch. In photo 14 you can see where to insert the hook. If you look at the side of the magic ring you’ll see a chain pattern. The hook passes in the space underneath (photo 14). The space will be quite obvious.
Wrap the yarn around the hook and draw the hook back through the stitch (photo 15). Now you’ll have two loops on the hook. Yarn around again and through both loops.
So it’s the same single crochet stitch as before, but now you are going through the stitches below instead of the magic ring.
Hook through. Yarn over. Pull through. Yarn over. Pull though both loops.
Now repeat into the same space/stitch. The first round will have two single crochet stitches into each stitch of the previous round, so the number of stitches will double to 16.
In the second round crochet one single crochet stitch into the first stitch of the previous round, then two stitches into the second one. Repeat this alternating pattern for the rest of the round.
On the third round do one single crochet stitch into each of the first two stitches of the previous round, then two into the third stitch. Repeat for the rest of the round. That completes the base.
To keep track of where each round starts take a look at the back of the base and you’ll see the tail of yarn from the magic ring. The position of the tail indicates the start of the round.
I have amended the tutorial slightly since first publishing it. I like my baskets to be very dense so I add a lot of stitches in each round. But following feedback from a lovely reader who is just learning I have changed the pattern slightly to make it more manageable. Please email me if you need help!
Joining new yarn
To join new yarn in a fabric basket you can just tie a double know if you wish. The knot will be mostly hidden in the texture of the basket.
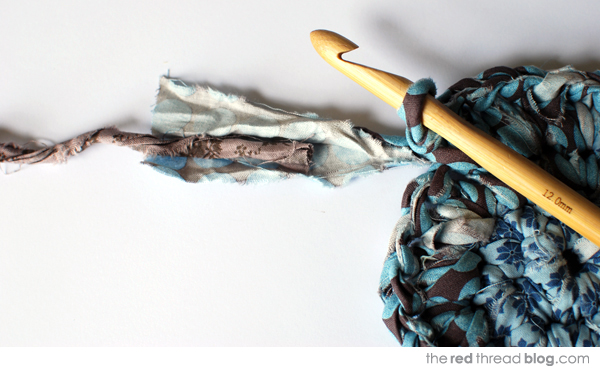
Or, I prefer to do it this way: open up the end of the yarn and place the new yarn on top, overlapping them by about 8 cm (3 inches). Then roll the open end around it.
Crochet the sides
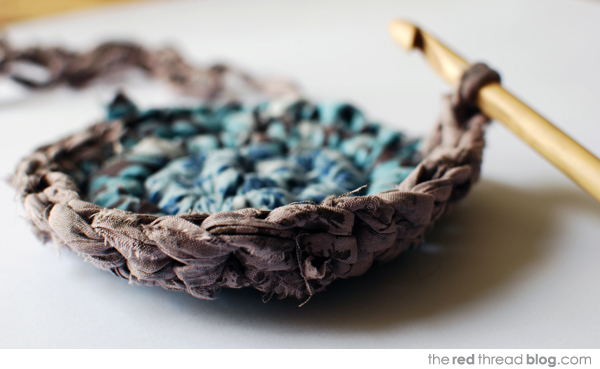
When you’ve finished the base all you have to do is continue on but with just one single crochet stitch instead of two in each stitch. As soon as you start doing this you’ll notice the side starting to curve up. Crochet 5 rounds or until you like the proportions of your basket.
Finishing off
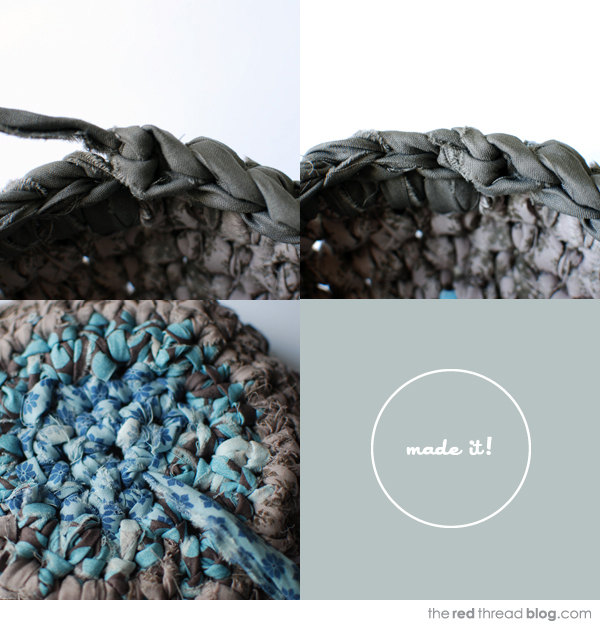
Cut the yarn so you have a length of about 20 cm (8 inches) left. Wrap the yarn around the hook and pull it all the way through the loop. Pull the stitch so it’s firm (photo below left), then weave the end of the yarn into a few stitches to secure it and cut the tail off (photo top right).
Turn the basket upside down (photo bottom left) and pull the tail in case the hole has opened up. Weave the end into the bottom of the basket and cut the remaining tail off.
I think that might be the longest tutorial I’ve ever done! I hope you find it useful and the instructions are clear. The fabric yarn baskets are really solid and sturdy and fun to make. Let me know what you think. Enjoy!
I bought my rag rope from Gypsy River but unfortunately they no longer stock it, and I’m yet to find a new source. Please leave a comment if you know where to find some.
