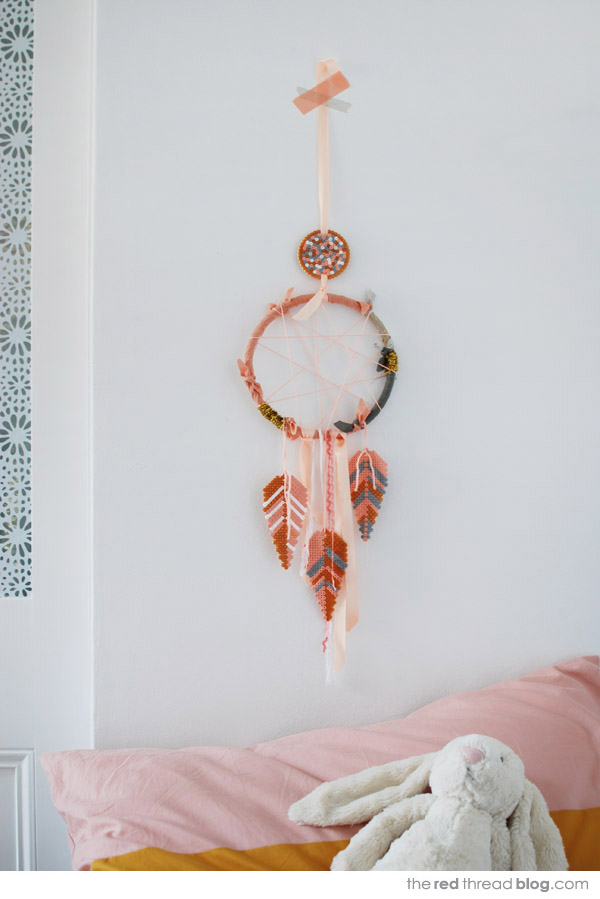
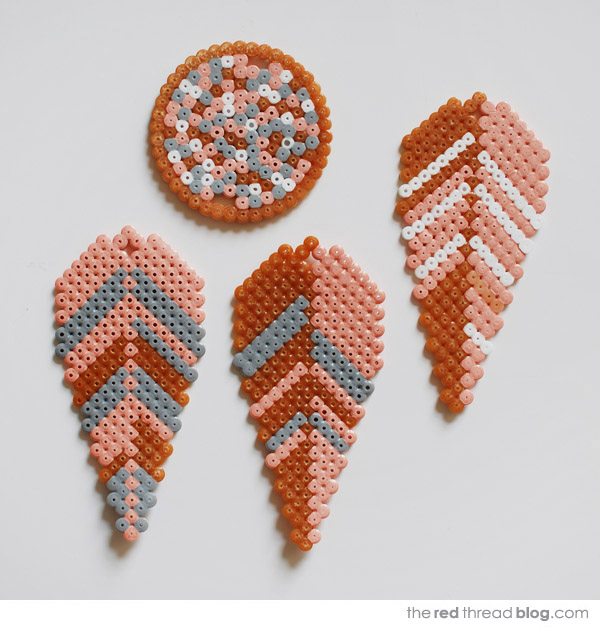
For someone who has never been into them it might seem a bit odd that I’ve created another dream catcher tutorial (you can see my first dream catcher here). I have to admit that I’m really enjoying designing and making my own versions – Roxy and I made this one together for her room. For this dream catcher we used Hama (aka Perler) beads – I’m more than a bit obsessed with them – to make the feathers and medallion at the top.
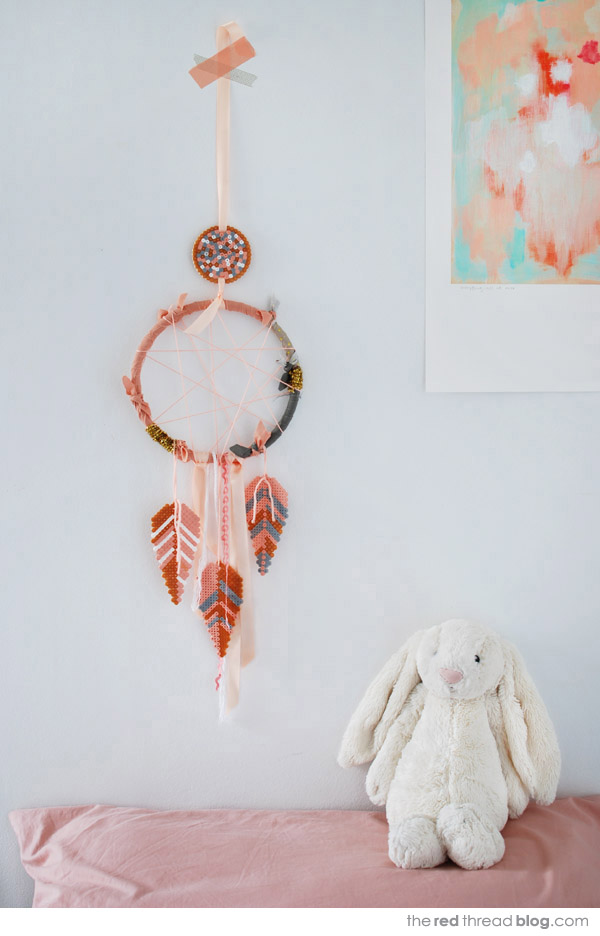
Dream catchers are made with a spider web like structure across a hoop which is said to catch and hold any bad dreams or bad energy that then disappear with the morning light. The good dreams and spirits pass through the holes in the web and slide down the feathers to the sleeper. I think that’s such a positive story for children and the dream catcher is a tangible thing that can bring comfort and calm to them. It’s also of course always wonderful to engage with children by sitting down and making things with them and modeling creativity. Click through for the full tutorial…
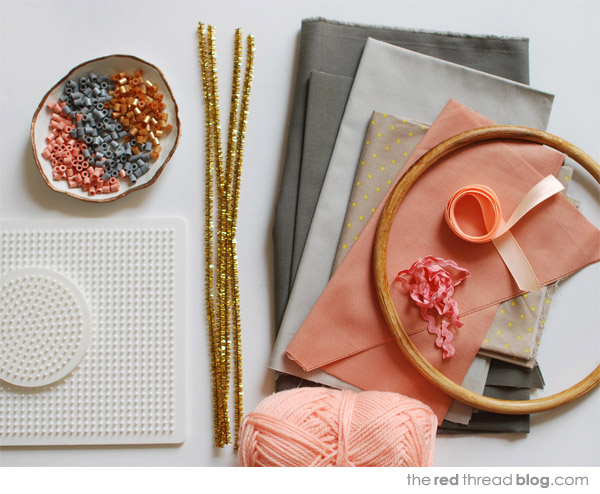
You’ll need:
- A rattan hoop or the inside piece of an embroidery hoop
- Fabric
- Yarn
- Ribbons
- Gold pipe cleaners (optional, but they add a little sparkle)
- Hama beads
- One large square Hama bead base, and a small circle base
Make the feathers and medallion
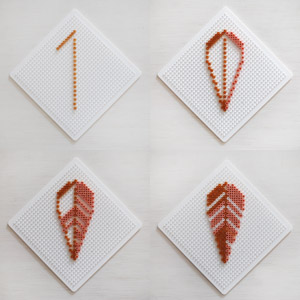
Turn the square base so it’s a diamond shape. Start adding the Hama beads down the central spine. Place one bead at the top, leave one space, then add 17 more beads. The space at the top is to thread the yarn through to hang the feather.
Starting back at the top bead add 8 more beads to create a diagonal row to the left. Place 6 beads to create a row above the previous one.
Now that you’re started follow the photos below, making the feather outline first then filling in the stripes.
Carefully iron the feather with a sheet of baking paper on top to protect your iron. Make sure you move the iron back and forth and don’t melt the beads onto the base. When it’s cool enough to touch remove the feather from the base, turn it over and iron the back. Don’t forget the baking paper!
Make three feathers with varied patterns – making sure you leave the space at the top for hanging.
Now make the circular medallion. We made an outline with gold beads then placed the rest randomly. There are two holes in the medallion to thread ribbon through. The holes are opposite each other, one row in from the outline and two beads wide.
Make the hoop
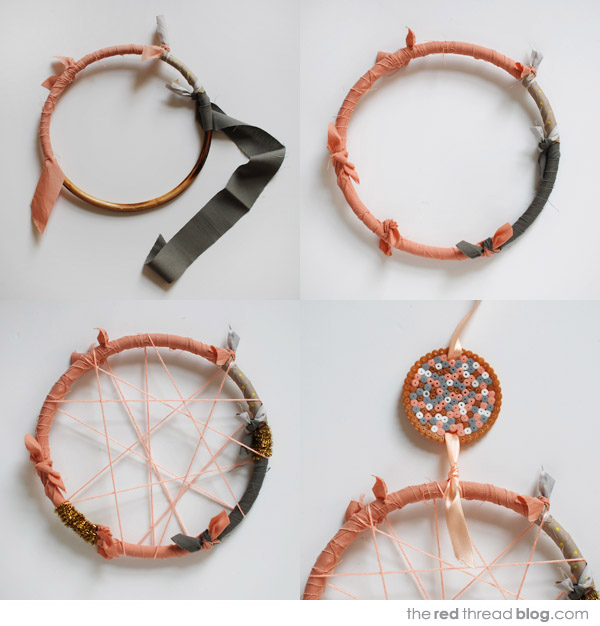
Covering the hoop is easy – just cut or tear lengths of fabric and wrap them around the hoop. Leave about 8 cm at the beginning so you can tie the first strip to the last one. When you want to change fabric, and to finish off, just tie the pieces together with a double knot.
If you want to add some sparkle wrap a couple of the gold pipe cleaners around the hoop.
To make the web, tie yarn around the hoop in a neat double knot at the back. Trim the end close to the hoop. Wrap the yarn across and around the hoop until you’re happy with the web, then finish with another double knot at the back.
Add the embellishments
Thread a long length of ribbon in through the top hole of the medallion, then pull it out through the bottom hole. Tie one end of the ribbon to the hoop.
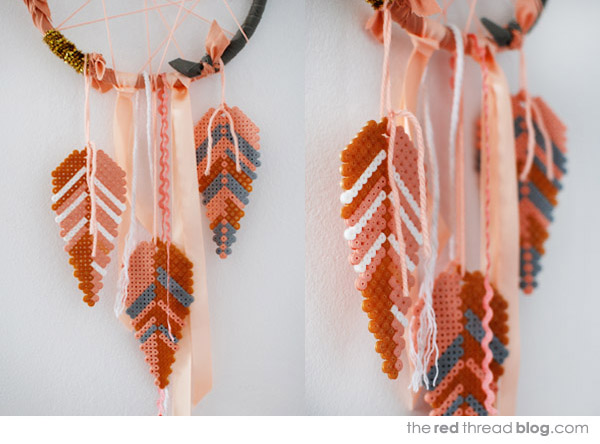
Thread lengths of yarn through the feathers and lay them out at staggered heights below the hoop. Attach the feathers to the hoop, then add ribbons, trims and yarn of varying lengths to hang amongst the feathers.
Hang your dream catcher
Hang the dream catcher above your child’s bed and admire it together. When they go to bed each night remind them of the story behind the dream catcher and wish them sweet dreams!
