Super stylish. Super easy to make. Super practical. These crushed paper storage sacks are all that and they’ll cost you less than a dollar each. A paper storage sack is perfect for holding craft supplies, stationery, make-up, a plant or even Christmas gifts. Even though they’re made of everyday brown paper, they’re actually very durable. The secret is in the making: when you scrunch up paper it becomes softer and is less likely to tear.
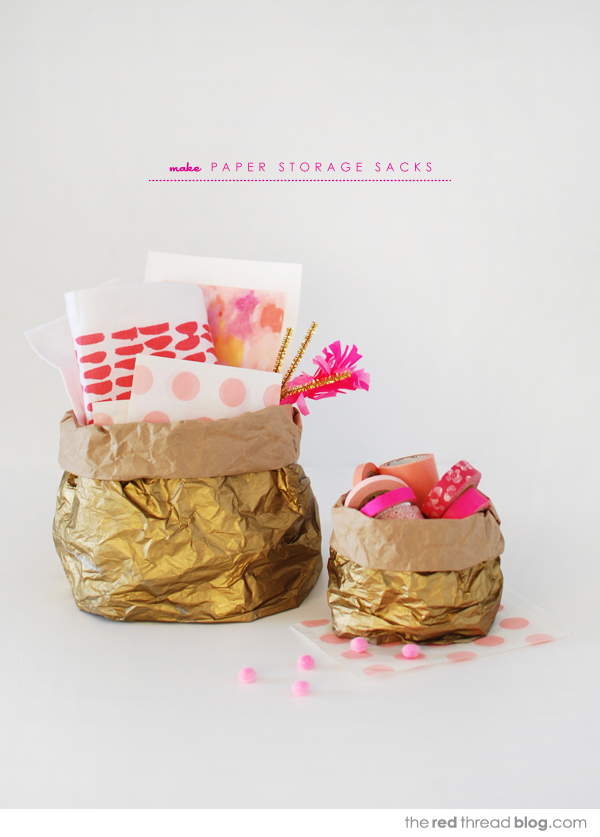
As well as being simple and quick, the materials list is minimal. All you’ll need to make your own paper storage sack is a large piece of brown wrapping paper (the type used to wrap parcels for posting), gold spray paint, and tape. I used washi tape to make it a feature, but you could use clear tape or double sided tape.
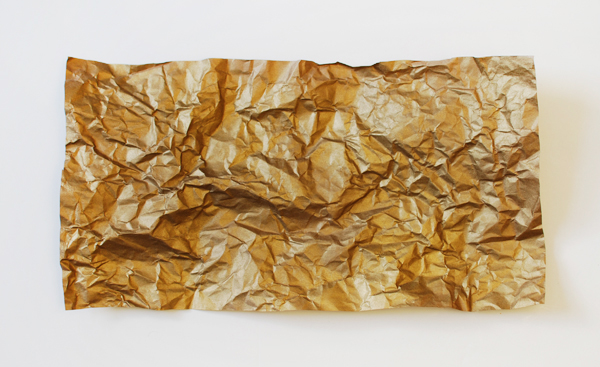
Prepare the paper by spraying one side gold. Make sure you do this outside or somewhere well ventilated. I like to spray a few large pieces at a time then even if I don’t use them straight away I add them to my paper stash. Cut the paper to size – to make the small sack, I used paper 32 x 20cm (roughly 12 x 8 inches).
Scrunch and flatten out the paper and repeat a few times. You’ll notice that it becomes softer, more pliable and less likely to tear.
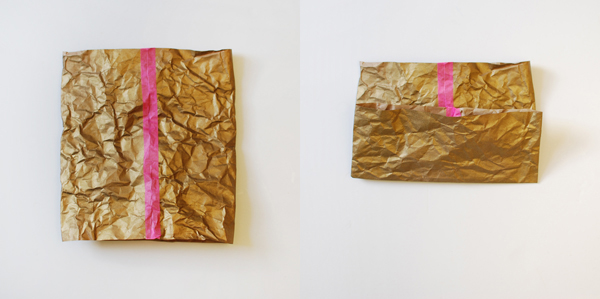
With the brown side of the paper facing up, fold in the left and right sides so they meet in the middle. There’s no need to crease the folds. Then tape along the join. I used contrasting washi tape, but you could use clear tape, or if you’d like the join to be less visible, overlap the paper and use double-sided tape. Fold the bottom edge up as shown.
Open up the base of the sack by folding down the bottom layer of paper. Flatten down the left and right sides as shown. To achieve a flat fold and a point at the outer edges, it helps to put a finger inside the corner.
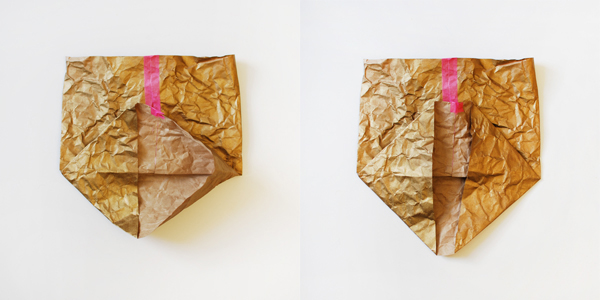
Fold the bottom point up so the edge meets the fold, then fold the top point down to meet it. Tape along the centre to secure the base.
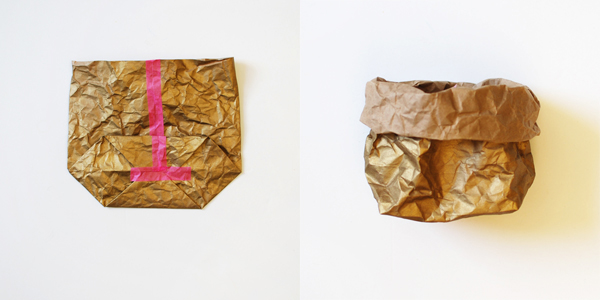
Put your hand inside the sack to open it up. Now scrunch it up to make the side folds less defined.
Roll the top edge over a little way. Don’t make a hard crease then roll the top edge over again. It will look softer and better if you roll instead of fold. Scrunch the sack into a nice shape and you’re done.
Now you can use your lovely gold paper storage sack as a nice way solve some storage issues or for unique gift wrapping. If you’re using one as a planter, place the pot inside a plastic bag first.
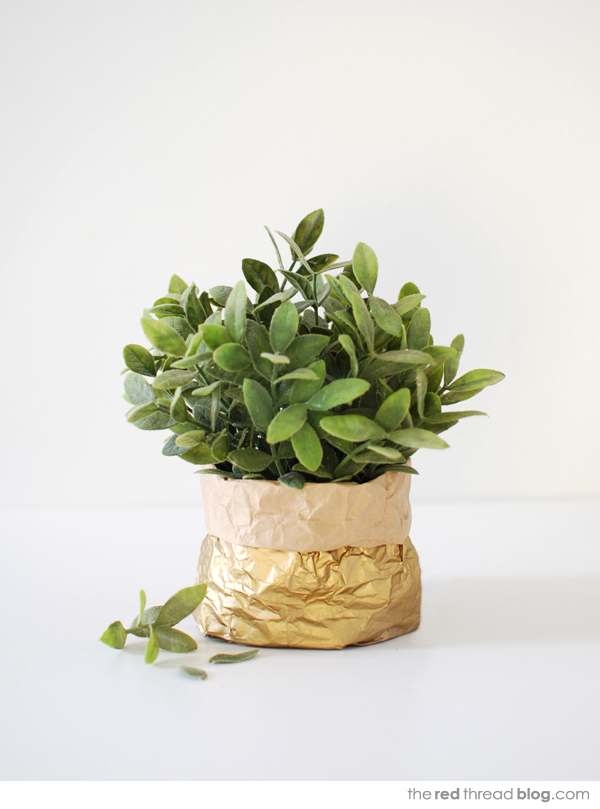
Just like I said: super easy! These gold paper storage sacks are durable and fun and they are perfect to sit on your desk, shelves or even your mantle because they look so good. If you like this tutorial don’t forget to check out SCOUT magazine for more of my tutorials and printables for the festive season and beyond.
For lots of craft inspiration and tutorials visit the We Are Scout Craft and DIY page.