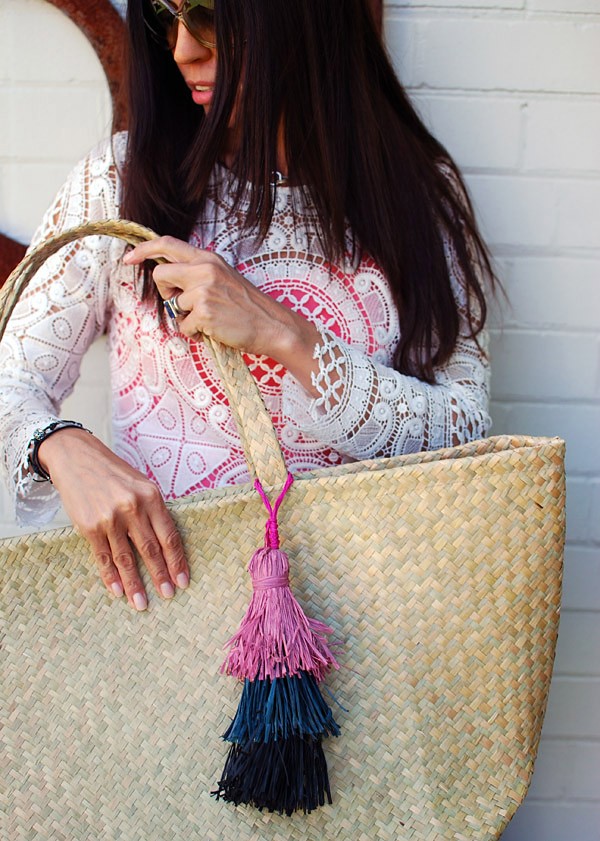
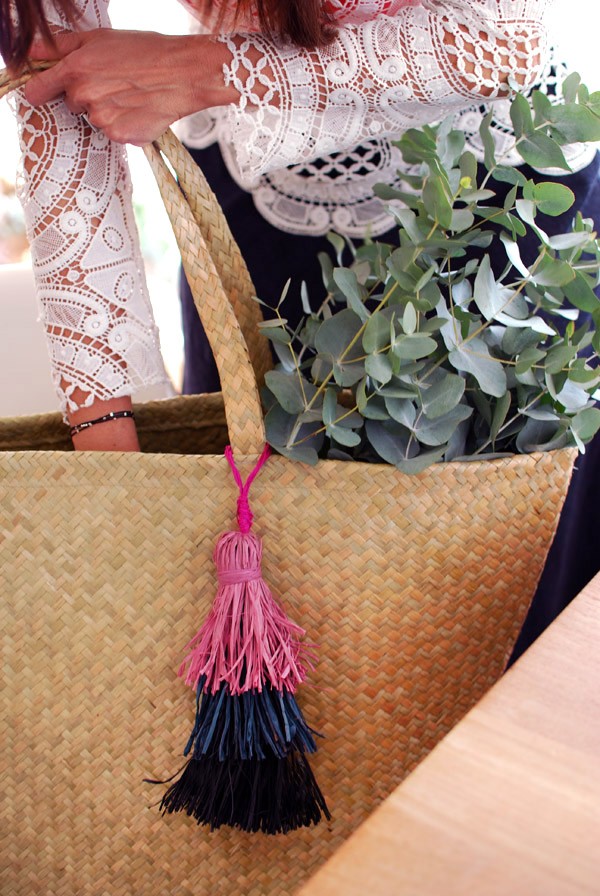
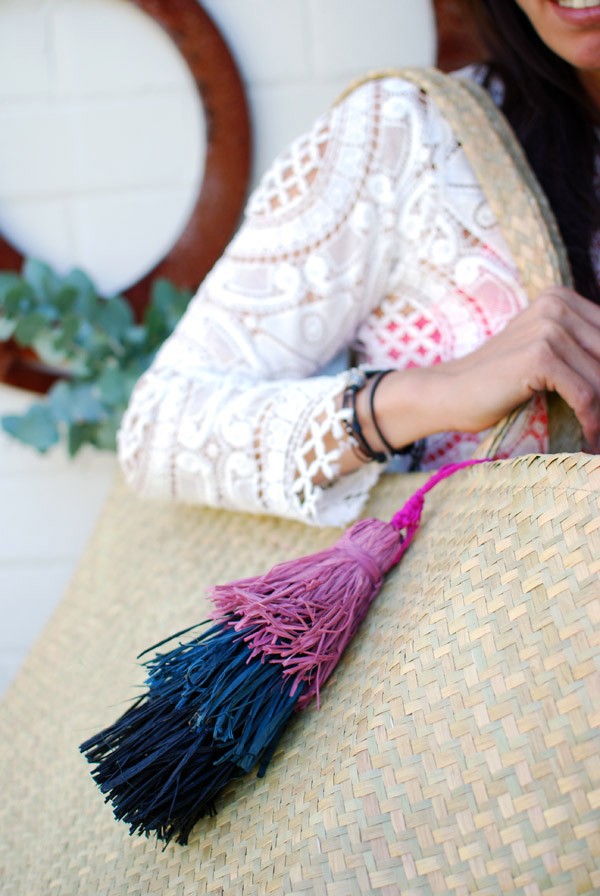
A lovely oversize tassel can immediately elevate a plain tote from plain and predictable to completely covetable. A simple straw bag becomes a statement accessory with the addition of a beautiful layered raffia tassel.
Tassels are a great addition to the zip pull of a clutch purse, hang one on a cupboard door handle, or add it to your gallery wall for some 3D texture.
I buy my raffia String Harvest – they have a gorgeous range of colours to choose from.
OK, let me show you how to make a layered tassel!
Materials
Raffia in 3 different colours. I used a fourth colour for the cord because I had a scrap handy.
Let’s get started
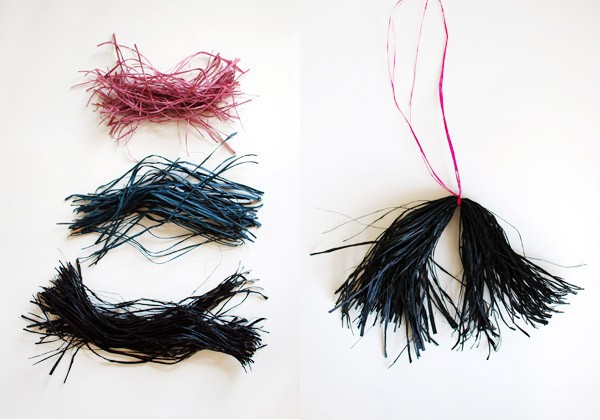
1. Cut your raffia to the following lengths:
Pink raffia 12cm long.
Teal 18cm long.
Black 24cm.
You’ll need a good handful of each colour to make the tassel nice and plump.
Now cut single pieces of each colour to about 50cm long.
And you’ll also need two long pieces to hang the tassel from – about 80cm in length.
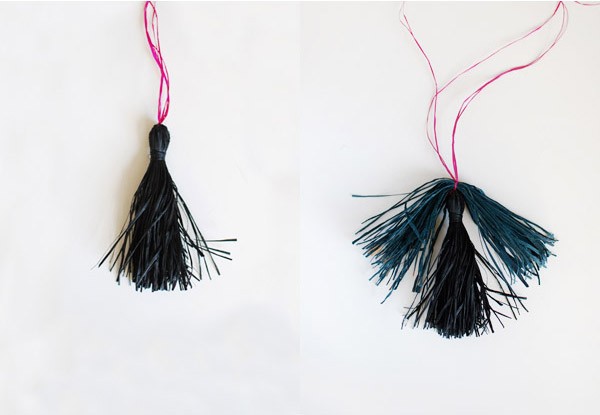
2. Fold the black raffia to find the centre and tie the long piece tightly around it with a double knot.
3. Take the 50cm length of black raffia and tie it around the tassel, following my directions here.
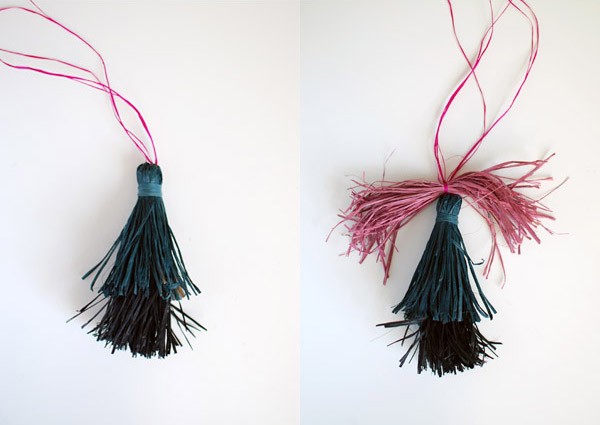
4. Fold the teal raffia to find the centre and bring the long piece up and tie it tightly around the teal raffia with a double knot.
5. Take the 50cm piece of teal raffia and finish the tassel as before. Make sure you bring the teal raffia down and around the black tassel so it covers it completely and evenly.
6. Repeat with the pink raffia.
7. Carefully trim the bottom of each colour off so it’s straight. I trimmed a couple of centimetres off to achieve straight edges. Hold the raffia out from the tassel so you don’t accidentally cut the colour below it.
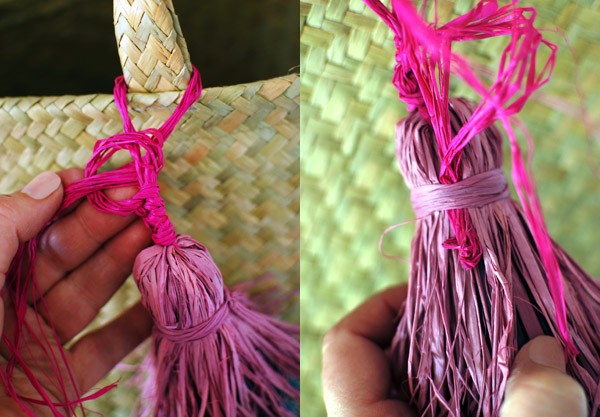
8. Attach the tassel to your tote bag. by twisting the dark pink raffia so it becomes a single strand.
9. Wrap it behind the bag handle.
10. Tie a series of knots in a row. Make a back to front ‘D’ shape then pass the raffia under and through the loop. Pull tightly. Repeat.
11. Fold the raffia over and thread it through the wrapped section on the tassel. Trim the end off so it’s a few centimetres shorter than the pink part of the tassel.
12. Poke the ends inside the tassel to hide them.
The result is a stunning decorative tassel that you can use to embellish a plain woven tote – or add it to the top of a gift for a decorative touch – and extra gift.
Like the idea of tassels? You might also like to make them with scrap fabric, or learn how make a knotted tassel statement neckpiece.
Want more DIY ideas? Have a look at all of our craft projects.
Photography and styling by Lisa Tilse for We Are Scout. Thanks to Carolina for being our model!
