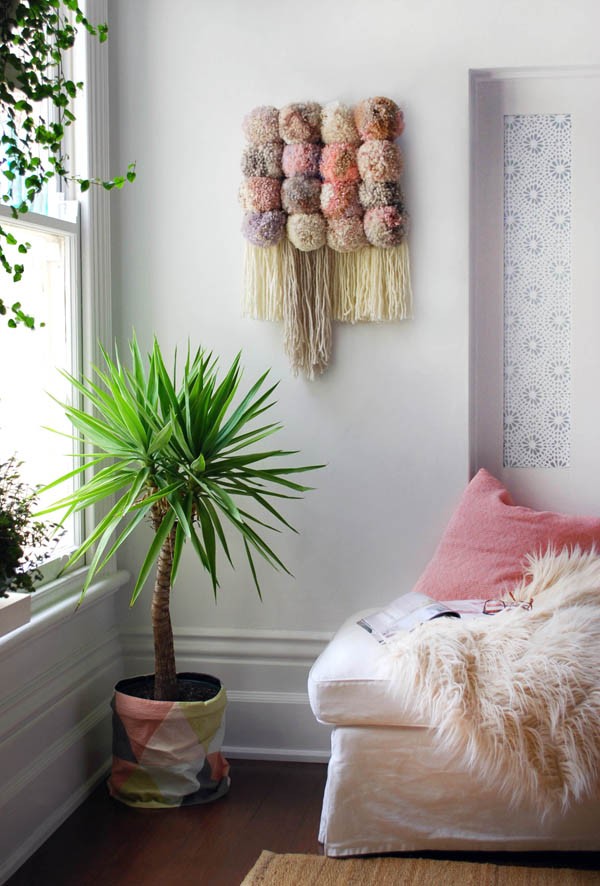
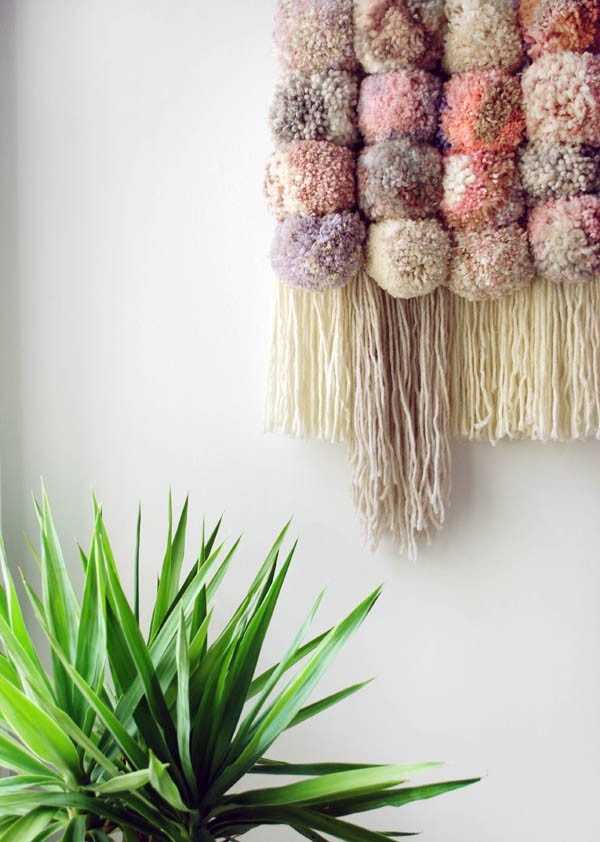
Add some lush texture to your wall with a statement wall hanging. Wall hangings are right on trend at the moment and the look of the ’70s is a big source of inspiration. Think layers of texture, pom poms, tassels and 70’s signature shag.
My wall hanging is big on style and impact, but it’s super easy to make. There’s no need to spend hours weaving – this wall hanging uses giant pom poms which require minimal craft skills. This makes it perfect for beginners, and it’s a great way to use up your left over yarn stash.
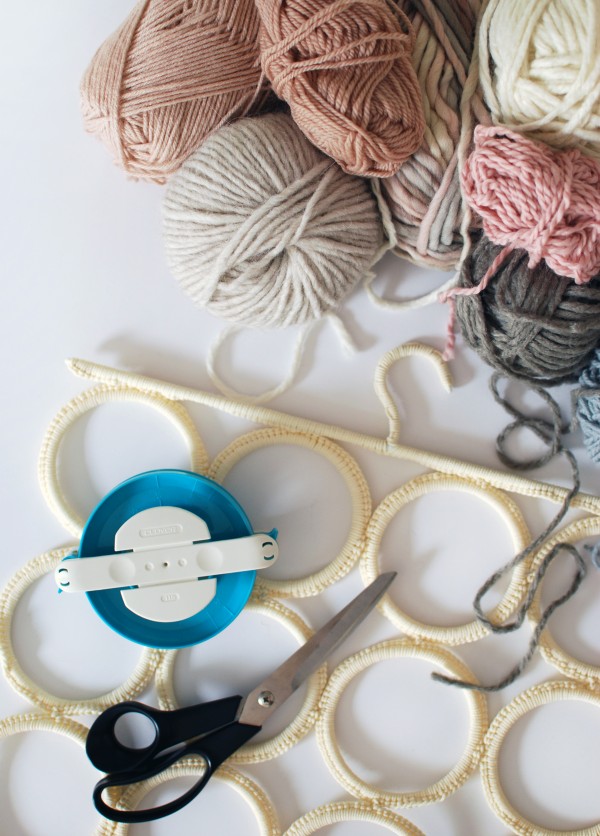
To make this pom pom wall hanging you’ll need lots of yarn. I started off using yarn I already had in my stash, but because the pom-poms are so big, and I wanted to stick to a specific palette, I ran out and had to buy more.
This is a great stash-busting project, especially if you’re going for a multi-colour, anything-goes look. Using different types of yarns and thicknesses add texture, and although I mainly used wool, I mixed in cottons and acrylics, too.
You’ll also need an Ikea Komplement hanger to use as the backing structure. (Yes, this tutorial is an Ikea hack, too!) You could also use plastic gardening mesh attached to a length of dowel.
And finally, you’ll need pair of sharp scissors (the ones our mums used to call “the good scissors”), and a 115mm (4.5 inch) Clover pom pom maker. There are a few other ways to make pom-poms, but using a pom-pom maker is by far the easiest, and you get lovely lush round poms.
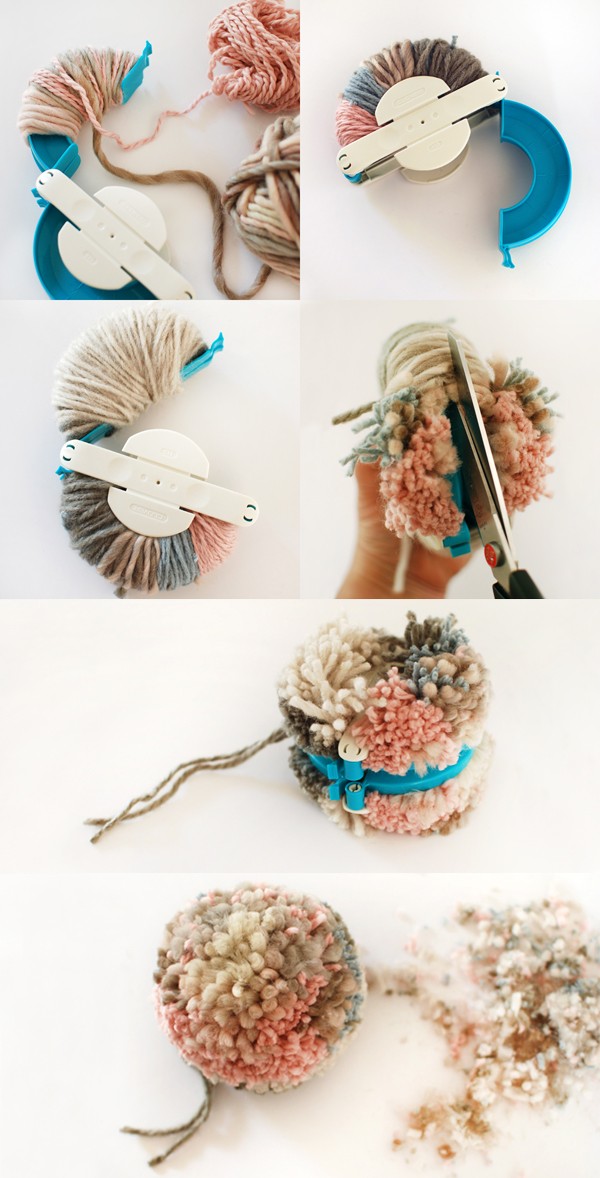
When making the pom poms, use different yarn colours and thicknesses in different sections. Wind two or three yarns at the same time. Mix it up to achieve an interesting finish.
How to use a Clover pom pom maker
Wind the yarn onto the pom pom maker fairly tightly – this will make the poms very thick and dense.
After cutting the yarn on the pom pom maker, firmly tie a long piece of yarn around the centre, so you can easily hold and tie it.
When you remove the pom pom maker, trim the pom to create a perfect sphere. Keep turning it around in your hand, viewing it from all sides, and trim where needed.
Let’s make a pom pom wall hanging
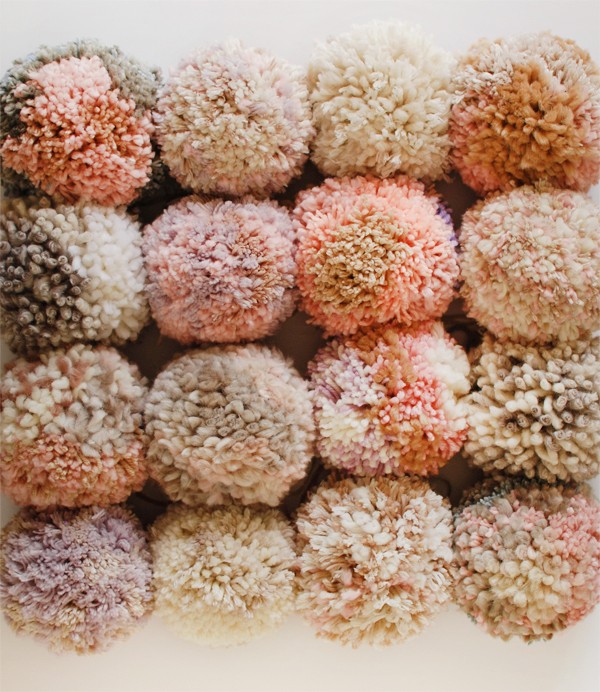
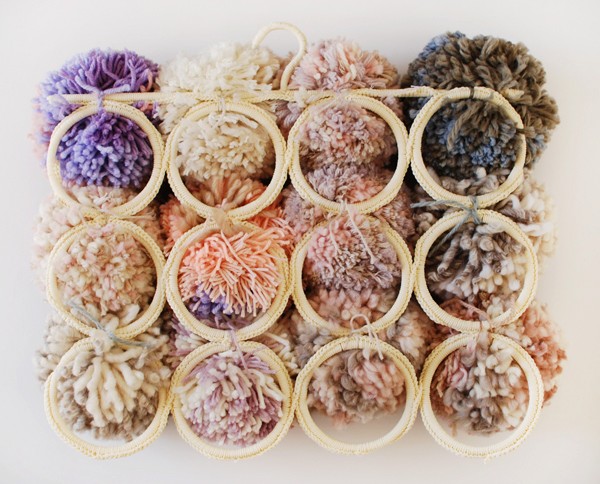
When you’ve made 16 pom poms, lay them out and move them around until you are happy with how the colours and patterns work together.
Take the hanger and cut it into two sections – the top section with the hanger is three circles tall. Set aside the bottom piece, and I’ll come up with another tutorial to use it!
TIP: You’ll notice that some of the pom poms on the underside – the part attached to the hanger – have some dark grey and violet pieces in them. I wanted to save the softer colours for the front of the wall hanging, so I wound the dark grey and violet yarn on one side of the pom pom maker, and ensured I positioned them facing the back of the hanger. It’s a sneaky way to use up yarn that doesn’t fit in your colour palette!
Starting at the top of the hanger, tie a pom-pom on to the centre top of each circle. This will be the back of your finished wall hanging. Wrap the yarn around the hanger a few times before you tie the knot to make sure it’s securely attached. Trim off the long ends.
Now tie the second row of poms to the section where row one and row two of the circles meet. Tie the third row of poms on to the circles below in the same way.
Keep the fourth row of pom poms aside for now.
Make the fringing
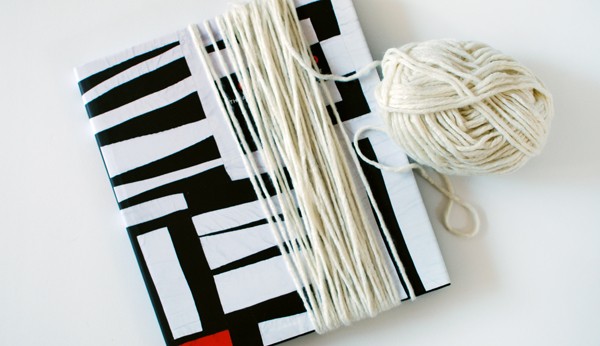
Find a book or a piece of cardboard that is slightly longer than the length that you’d like your finished fringing to be. The book I used is 34cm (aprox 13.5 inches) long.
I used a whole ball of thick wool for the cream part of the fringe. Wrap the yarn around the book then cut it off along the top of the book. You’ll have lengths of yarn that are twice the height of the book. You’ll need about 150 lengths, depending on the thickness of the yarn. The thinner the yarn, the more you’ll need.
Divide the yarn into groups of eight to 10 pieces.
Lay the wall hanging out with the right side facing up.
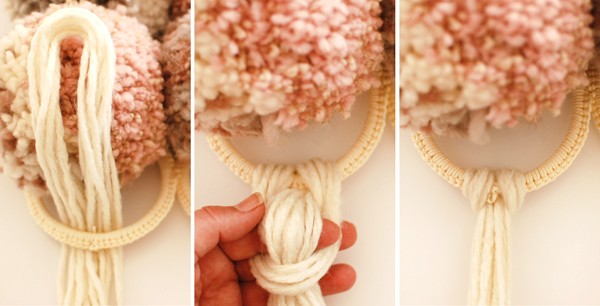
Take one group of yarn and fold it in half. Pass the folded edge under and through the first circle at the bottom of the hanger. Bring the folded edge back towards you and pull the tails of the yarn through the loop. Pull the tails to tighten the knot. Repeat, so you will have five knots on the first, third and fourth rings of the hanger.
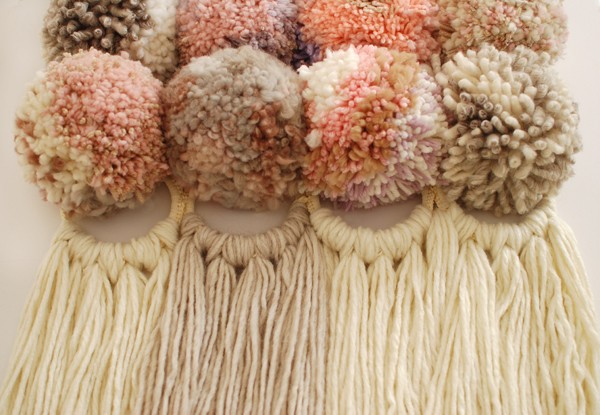
Cut 50 longer lengths of yarn in another colour and tie them onto the second circle.
Turn the wall hanging over so the back of it is facing up, and tie on the last row of pom-poms.
Now lay the wall hanging flat with the right side up, and comb the fringe with your fingers and trim it.
Hang your textural pom pom wall hanging and you’re done! Beautiful.
Don’t forget to check out all my other craft and DIY ideas, and if you’re into wall hangings you might like my round woven wall hanging DIY, or my chunky wrapped wool wall hanging tutorial.
Tutorial, photography and styling by Lisa Tilse for We Are Scout.
