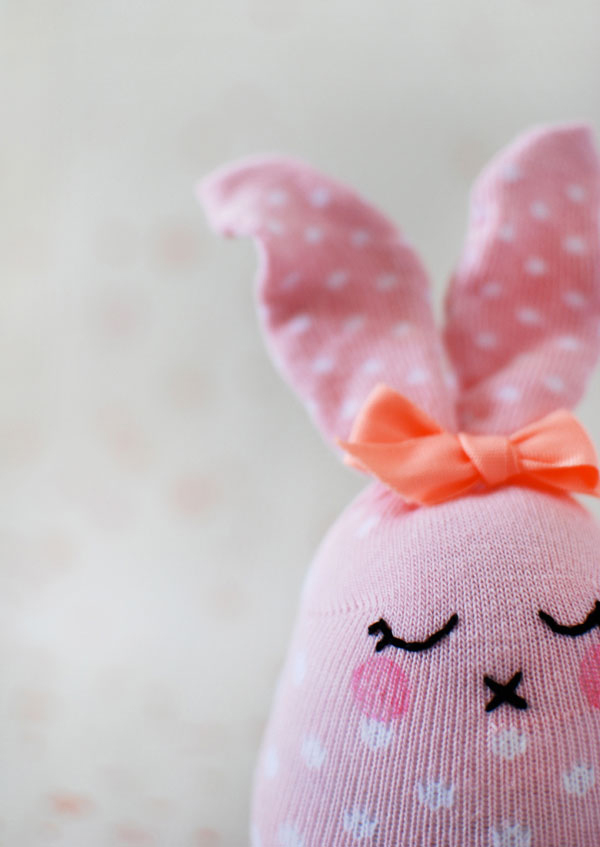
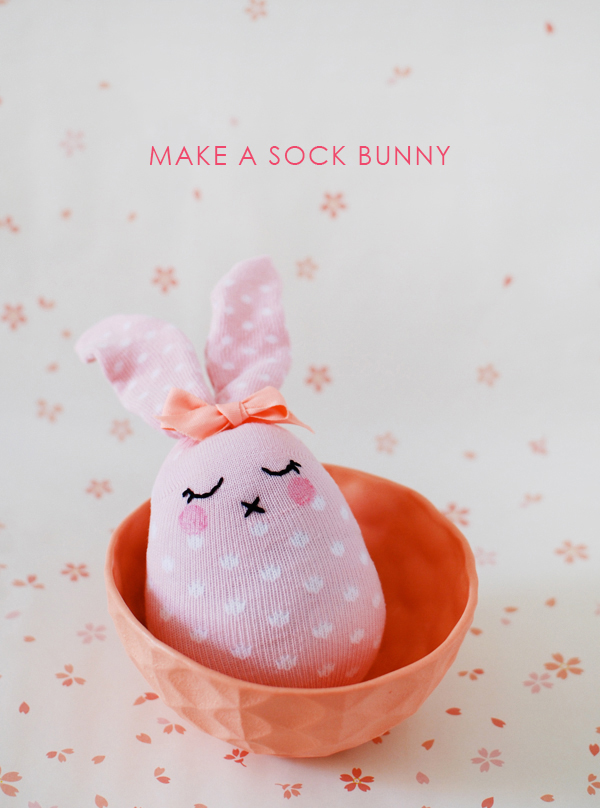
Easter doesn’t have to be all about chocolate – skip the sugar rush (and the aftermath!) and give the kidlets a sweet little sock bunny instead. Start with a pair of baby’s cotton socks and with a bit of hand sewing you’ll have handmade gifts in no time.
Sock bunny materials
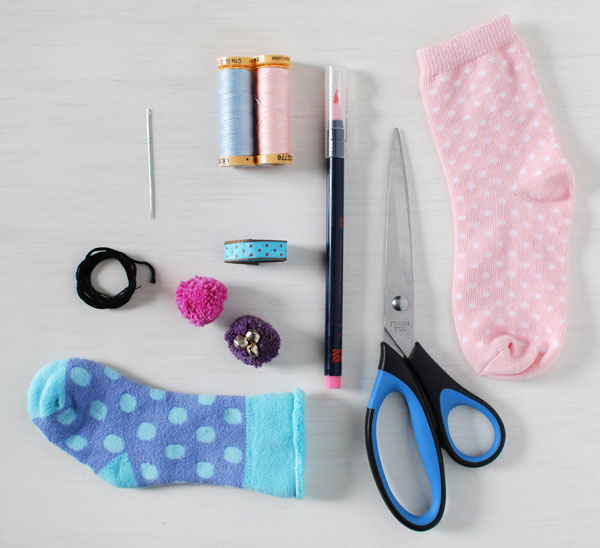
New cotton socks, newborn or baby size – one sock per rabbit
Scissors
Sewing thread to match the sock
A sewing needle
Black embroidery thread
A soft pink marker
Mini pom poms, ribbons or other embellishments
Toy stuffing
Let’s make a sock bunny!
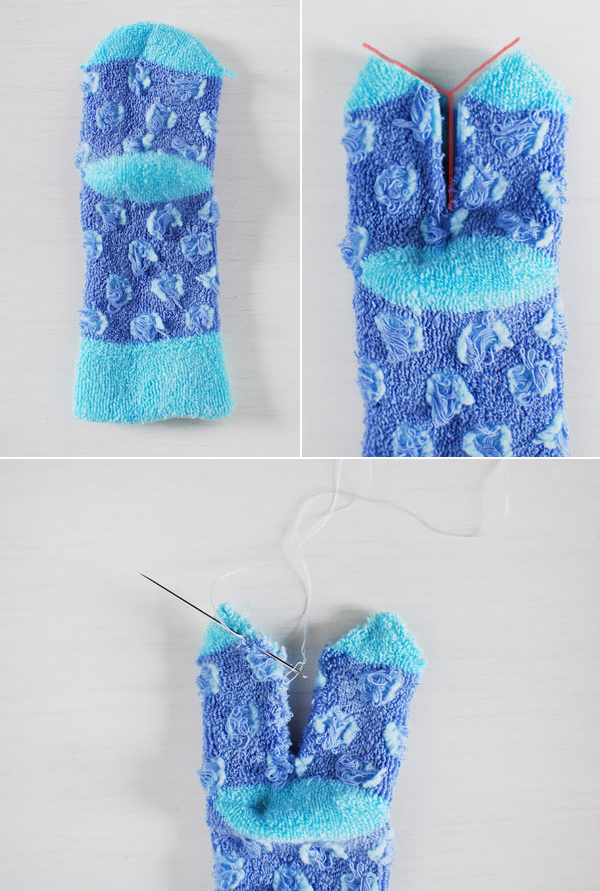
Turn the sock inside-out and lay it flat with the heel facing you.
To make the ears cut down the centre of the sock finishing just before the heel. Then cut a triangle out of the top of the toe by making two diagonal cuts, as shown below.
Sew the seam together. Start at the top point of one ear and sew along the cut edge, finishing at the top point of the other ear. Sew with small firm stitches. Reinforce the ‘V’ where the two ears meet near the sock heal by sewing a few double stitches there.
Now turn the sock the right way out and massage the ear seams between your thumb and fingers to flatten them out.
Use small pieces of toy stuffing to stuff the body, leaving the ears unfilled. Continue to add small pieces of stuffing until the bunny is nice and round. Mould the body into an oval shape so the bottom is wider than the top. The ears should be at the back of the head, with the heal of the sock filled out to make the rabbit’s face. The body should be firmly stuffed and round rather than elongated.
Cut off the ribbed section of the sock. Cut the sock short enough so that it has to be stretched to meet at the bottom. This way your sock bunny with be firm and round.
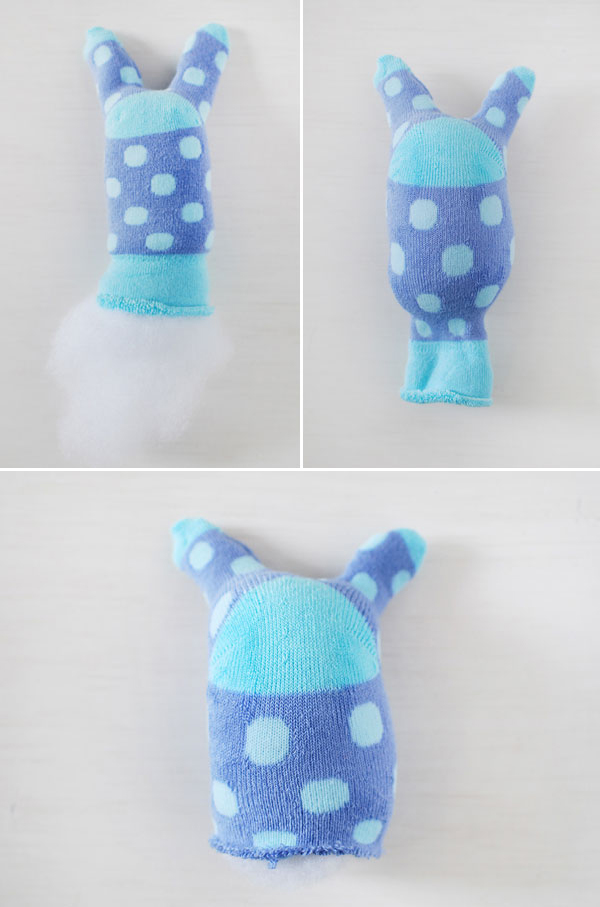
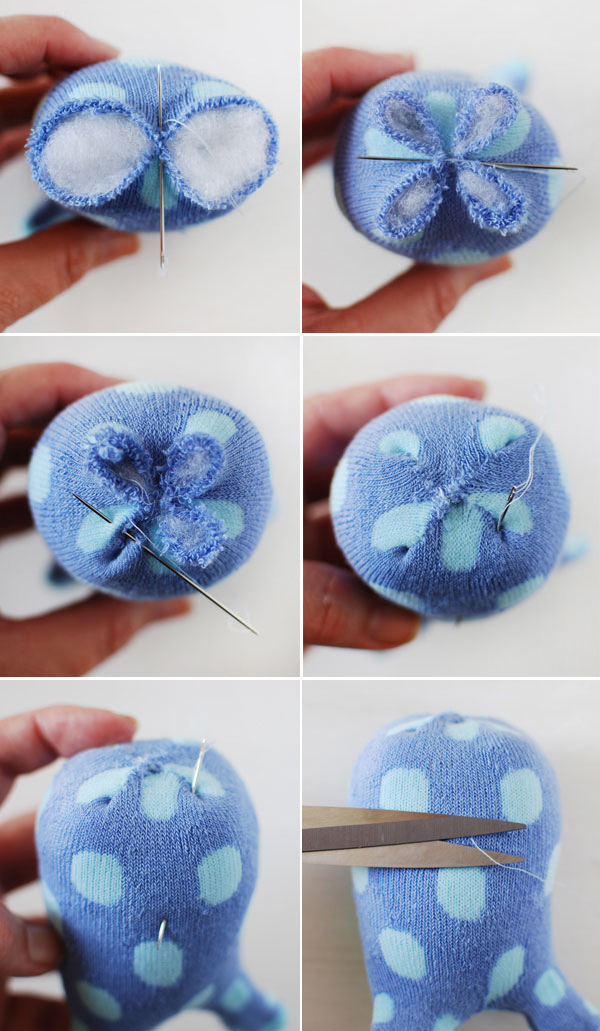
Now sew the opening closed with small neat stitches. Refer to the photos below.
Sew across the centre of the opening, to bring the two opposite sides together with a single stitch. Repeat a few times. Now sew the opposite two sides together in the same way.
Fold in the raw edges and top stitch across and through the folds to close the holes. Finish with a double stitch.
To hide the end of the thread pass the needle up through the body and out. Pull the thread and cut it close to the sock. The end will then disappear within the bunny’s body.
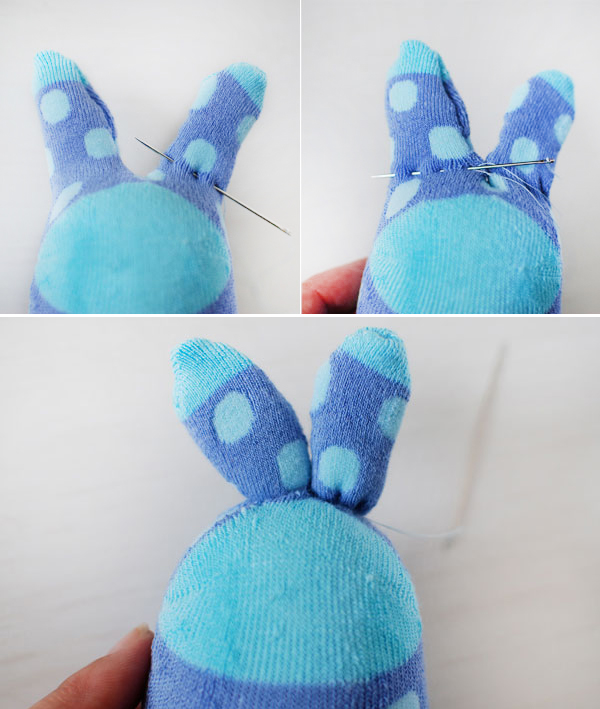
Now we’ll arrange the ears – refer to photos below.
Sew a row of running stitch across the bottom of one ear where it meets the head. The stitches should go through both the front and back of the ear. Gather the ear by pulling the thread, then secure the gather with a double stitch where the two ears meet in the centre. Don’t cut the thread – stitch along the base of the second ear and gather it in the same way.
Wrap the thread around both ears a couple of times to gather them together. Finish with a double stitch and pull the needle through the body as you did previously to hide the end.
Stretch the centre of each ear out to the sides, to create a nice shape, keeping the tips pointy.
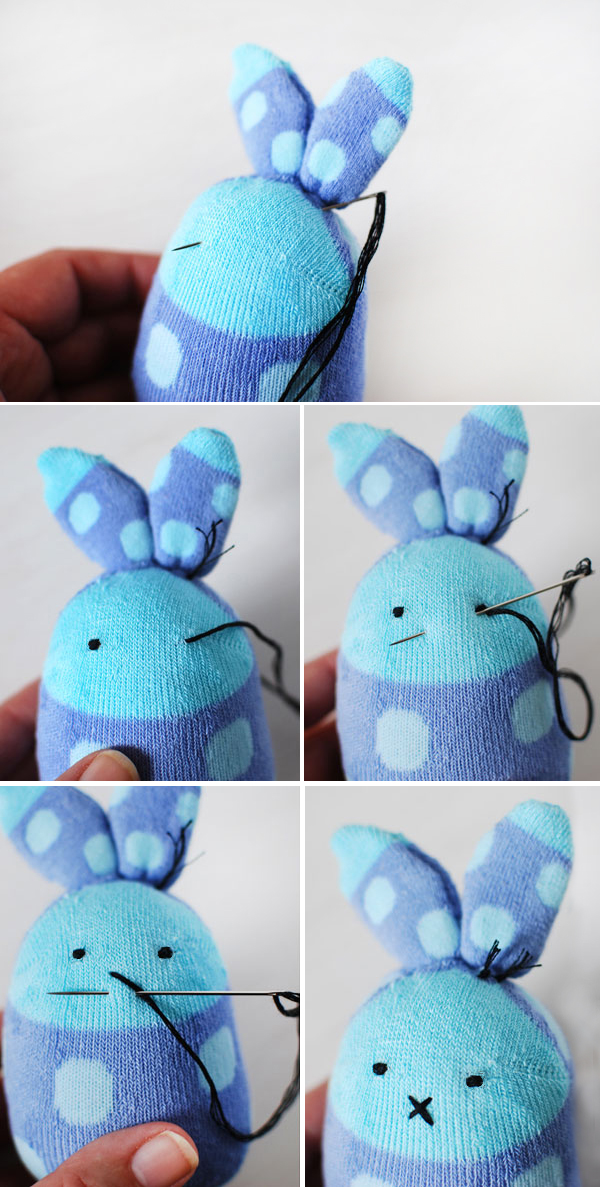
Create the bunny’s face by embroidering the eyes and nose and drawing on the cheeks (see photos below).
Thread the needle with black embroidery thread and tie a knot in the end. Insert the needle at the base of an ear and bring on the face to embroider the first eye. Create the eye with a cluster of small stitches to form a circle.
Pass the needle through the face and bring it out in position to stitch the second eye.
Next pass the needle through the face again, exiting where mouth will be. Sew a cross for the mouth, then take the needle but up to the starting point at the base of the ear. Tie a knot and trim the end of the thread off. We will be covering the ends of the embroidery thread with embellishments.
Finish by taking the needle back up to the ear, tie a knot and trim the ends off close to the head.
Add some rosy cheeks with a marker. Use light strokes to build the colour up – don’t be too heavy handed.
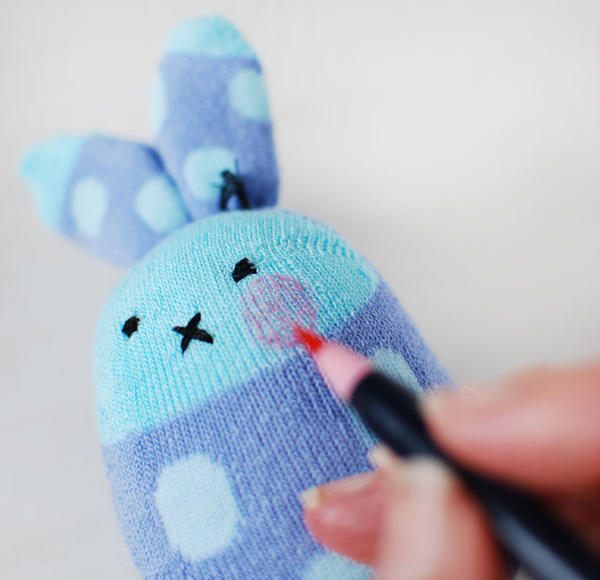
We’re almost done! All there is left to do is to add a tail and some embellishments.
Sew a little pom pom on for a tail. Add some pom poms, felt flowers or ribbons to the base of the ears and your super cute sock bunny is ready for giving.
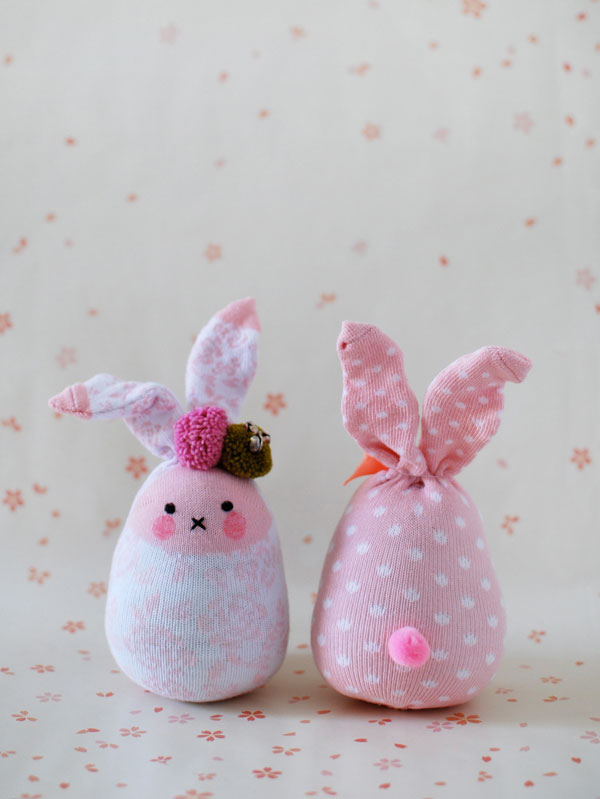
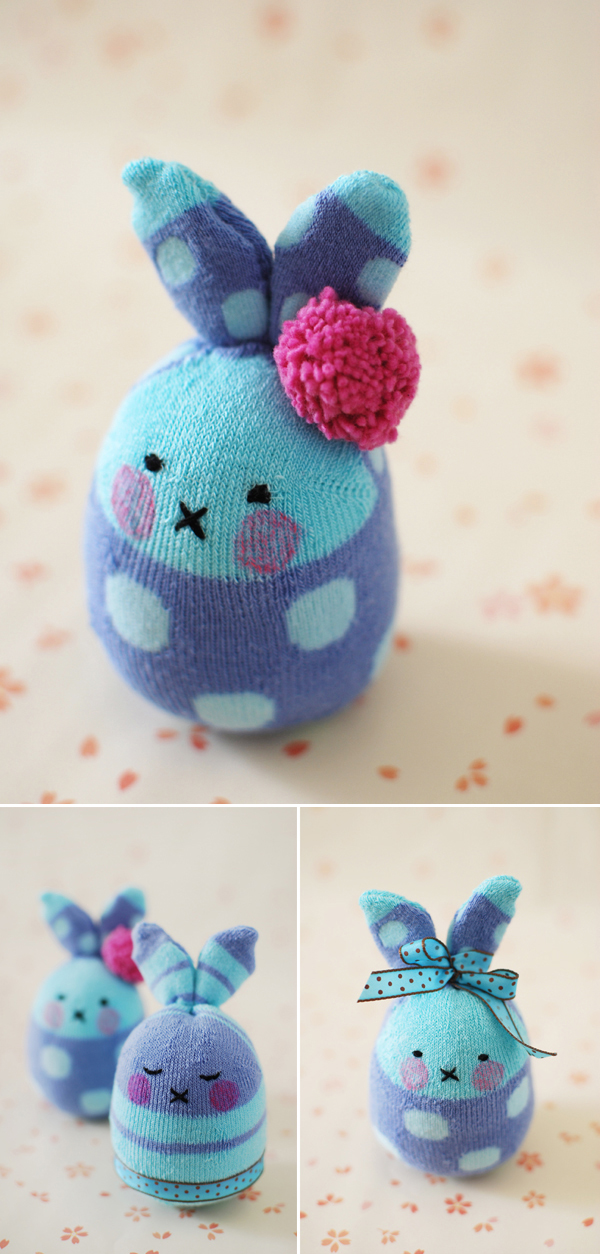
Hop to it (sorry for the pun) and get making for Easter. I know that kids will adore their own little sock bunny… maybe add a couple of little Easter eggs and you’ll have a guaranteed hit.
If you’re looking for more Easter craft you might like my adorable Easter bunny mini vases – made from eggshells or free printable carrot treat cones and Easter bunny treat cones. If you’re up for a spot of baking check out these watercolour Easter Egg cookies. Feeling creative? You can find all my craft and DIY tutorials on the crafts page.
