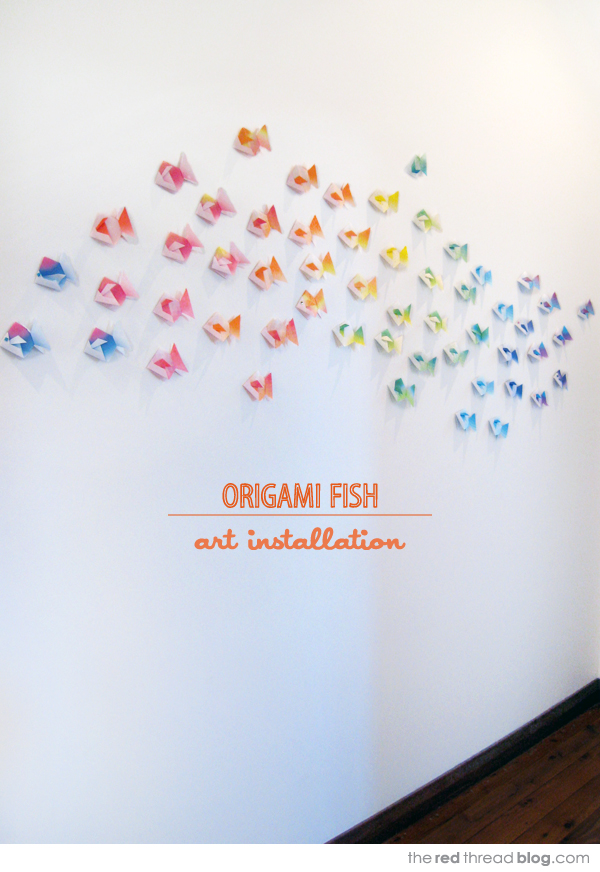
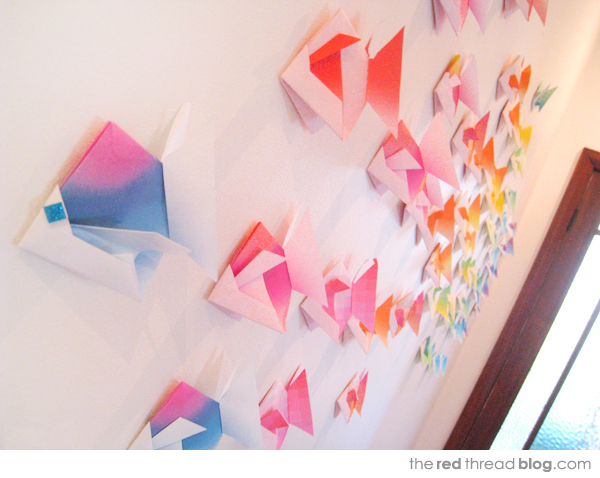
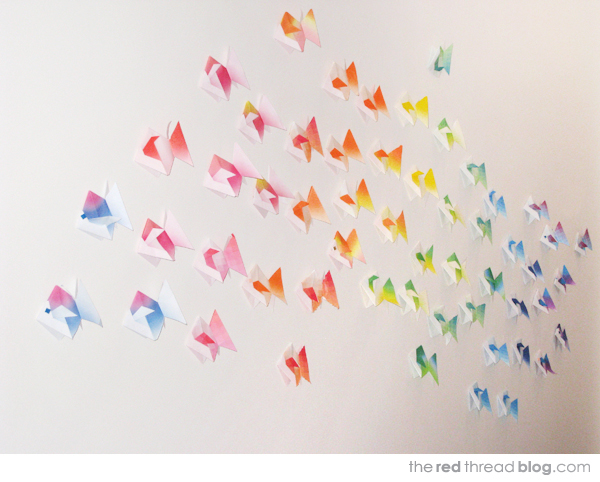
Roxy has loved origami since before she started school, and once she makes something she likes to make a lot of them. A few years ago, when she was six, she learned how to make an origami fish and we ended up with a big school of them. If you’re a long time reader you may remember my original post about the origami fish wall art we made. I came across the photos of the installation in the hallway of our previous home and thought it might be nice to share a tutorial with you. This is a lovely project to do with children because a group of them can all contribute to creating a sizable work of art. The origami can be attached to the wall with Blu Tac so it’s easily repositioned and removed too.
Click on the link below for the step by step instructions.
You’ll need a stack of origami paper and some Blu Tac. Roxy also added sparkly stickers for eyes on some of the fish.
Ready? Let’s fold!
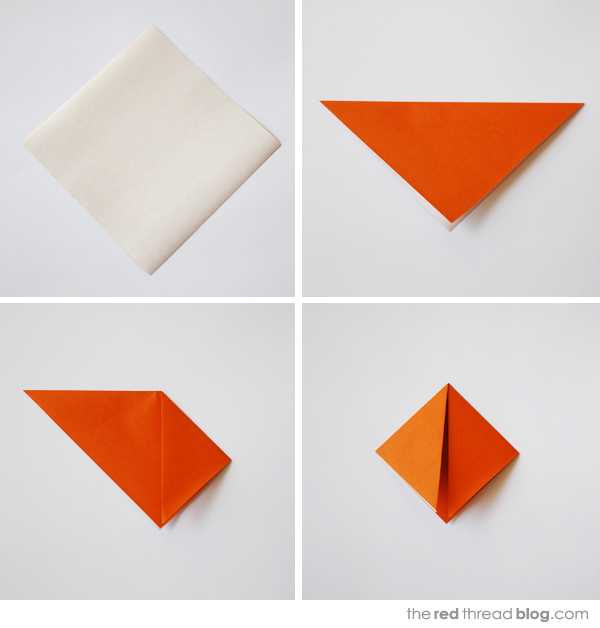
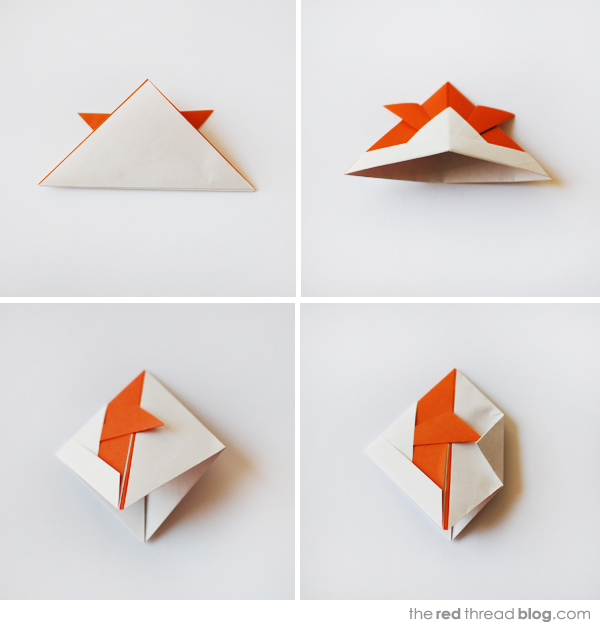
Fold the paper in half on the diagonal (top right photo, below).
Fold both corners into the centre (bottom left and right photos, below).
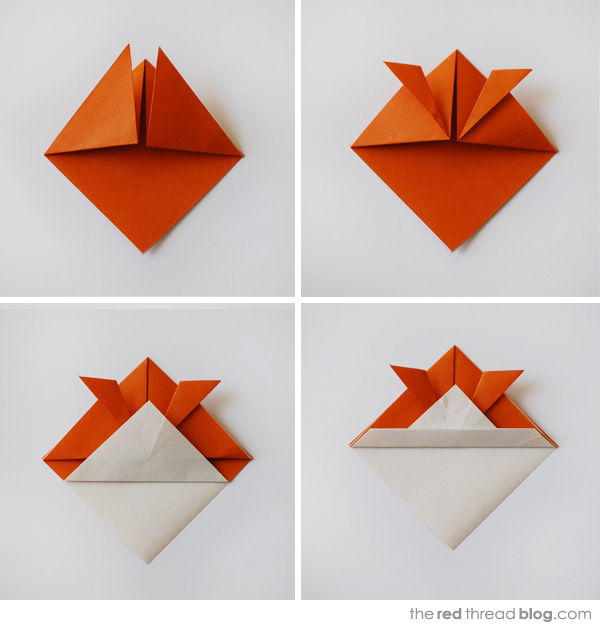
Fold the bottom points of the two flaps up to the top (top left photo, below).
Then fold each of the top points outwards (top right photo, below).
Fold the bottom point up (bottom left photo, below).
Then fold the same section up again (bottom right photo, below).
Turn the paper over.
Fold the bottom point up (top left photo, below).
Turn the piece over again. Hold both outisde corners and push them towards each other so the bottom of the piece opens (top right photo, below).
Still holding the corners and bringing them towards each other, the piece will fold into a diamond shape (bottom left photo, below).
Fold the right point over (bottom right photo, below).
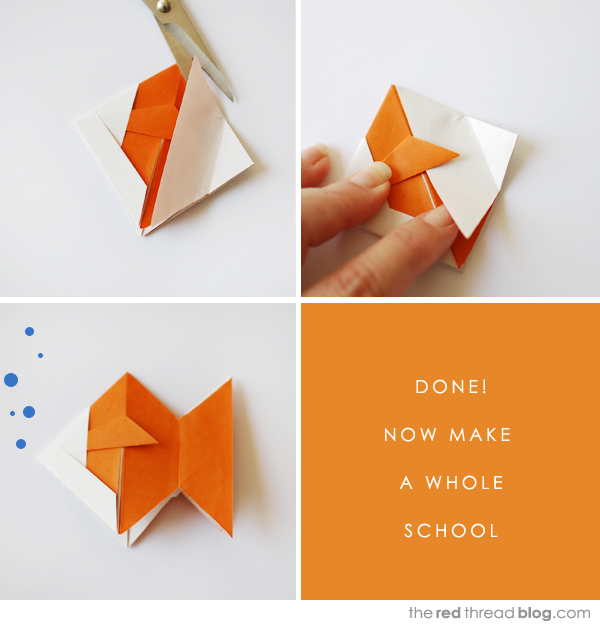
Open the fold you just made.
Carefully cut along the fold of the top layer of paper, along the fold. Stop cutting when you reach the fold you just made (top left photo, below).
Make the same cut at the bottom of the piece (top right photo, below).
Fold back the tail then turn the piece over and fold the tail back on the other side (bottom left photo, below).
Add some eyes if you wish, and using small pieces of Blu Tac attach the school of fish to the wall.
Roxy used origami paper with graduated colours and tones and I arranged them to create a rainbow effect. It would also look lovely using metallic papers, or even solids would look effective too. We stuck our origami fish art on the hall wall just inside the front door and they were a happy surprise for guests entering our home. I hope you have fun with this tutorial.
