Add some rainbow bright colour to your child’s room with this fun rainbow weaving. It’s not hard to make and it’s a good project to use up yarn scraps if you have them.
The rainbow sits atop a soft fluffy cloud with cascading felt raindrops and it will bring texture and softness to a nursery, kid’s room or a play space. I’ve never met a child who doesn’t love a rainbow so this wall hanging would make a beautiful handmade gift.
The idea came to me when I was making my round woven Christmas wreath – if you enjoy making this rainbow for your child give you might like to try round weaving something for yourself next.
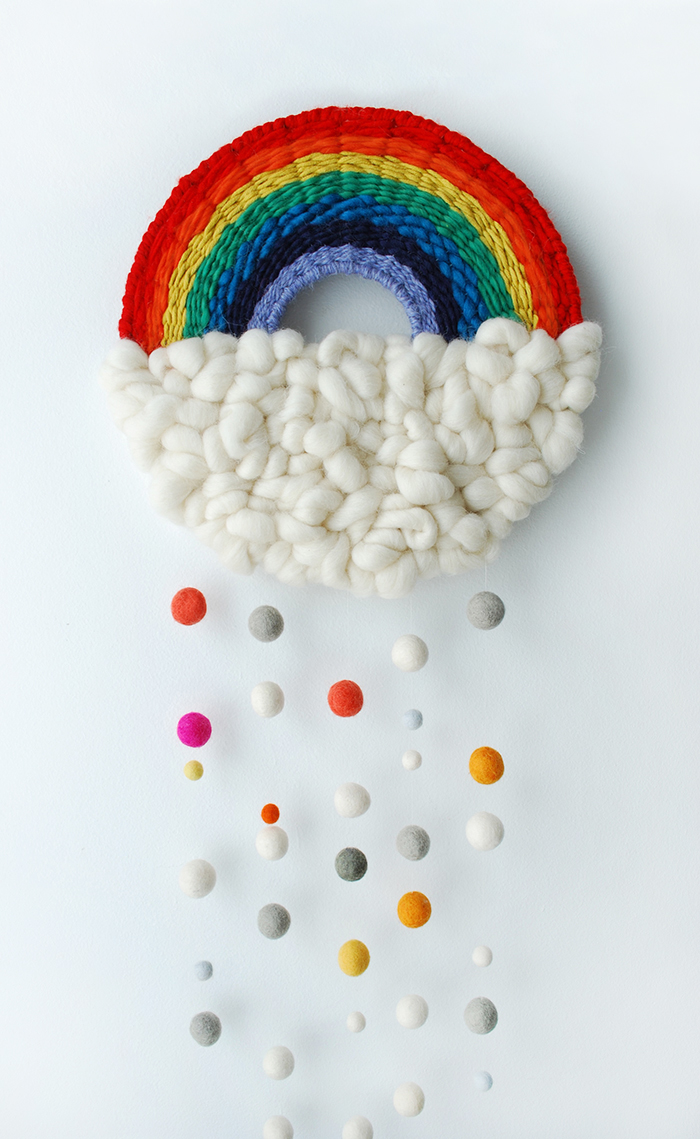
Materials for your rainbow weaving
For the rainbow:
2 x metal craft hoops: 30cm and 10cm diameter
White embroidery thread
Yarn in the colours of the rainbow
Darning needle with a large eye
Scissors
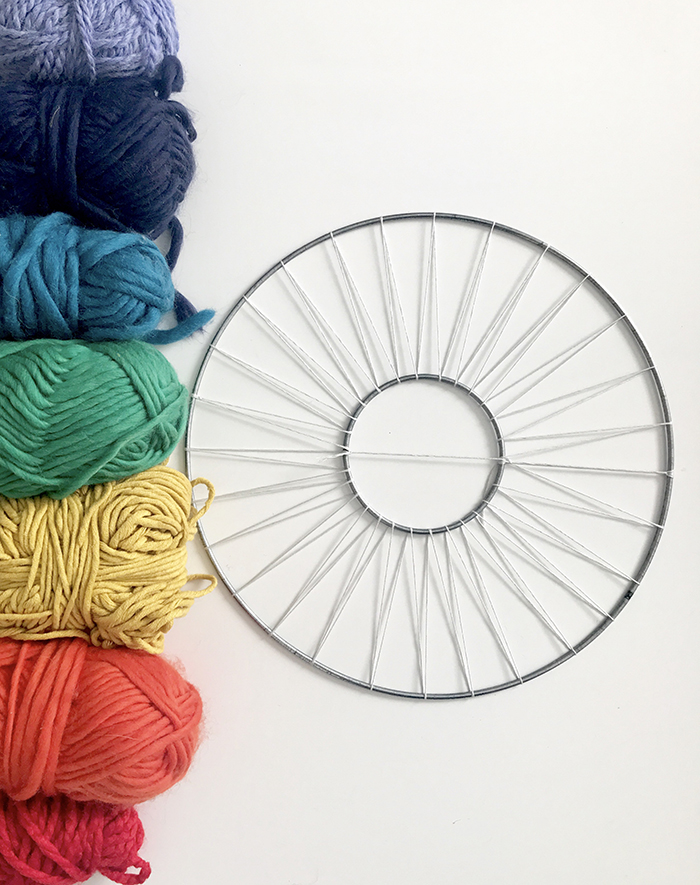
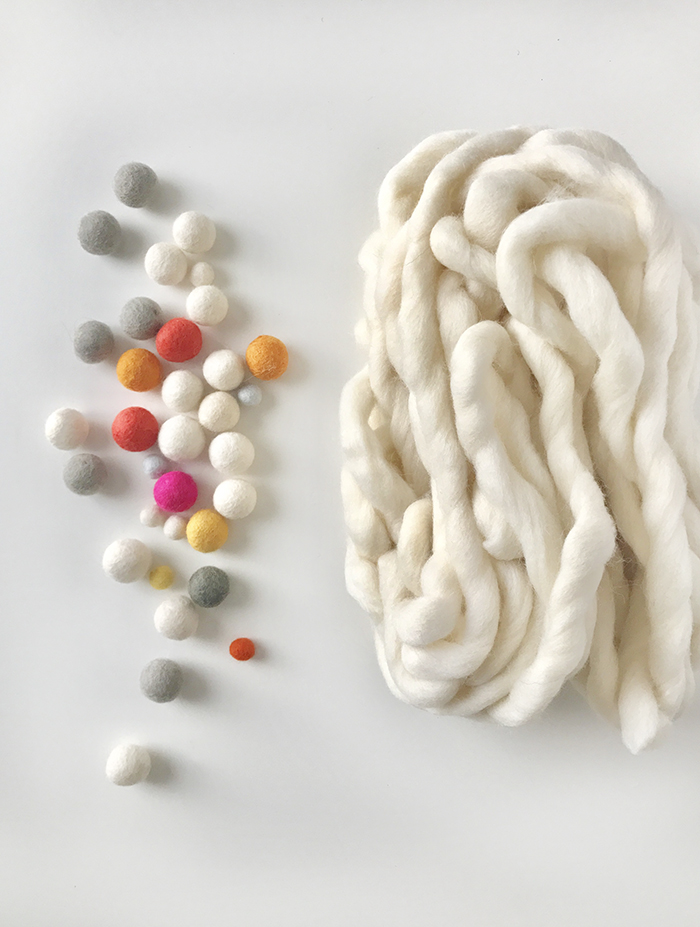
For the cloud and raindrops:
6 metres of wool roving
Felt balls
Sewing thread and a needle
Let’s get started
Weave the rainbow
Start by joining the two hoops together, as pictured in the first ‘materials’ image. You’ll find the step by step instructions showing how to do this on my woven round wall hanging tutorial.
Add an additional piece of embroidery thread to horizontally dissect the central circle in half (as shown in the first ‘materials’ image).
Once the hoops are joined and the framework of your rainbow weaving is in place we can start building up the colours.
Cut a length of violet yarn about a metre and a half long and thread it through the darning needle. Tie the tail end to the central hoop where the horizontal dissecting thread joins it. Leave a tail of about 7cm at the back of the weaving.
Start winding the yarn around the hoop until that the top semi circle of the hoop is covered. Refer to the photo below left.
Now start weaving the top semi circle, over and under the embroidery thread ‘spokes’ as you go around. When you get back to the beginning go under the horizontal embroidery thread and weave back in the opposite direction. When you’ve completed the violet stripe leave a tail of about 9cm hanging at the back.
Continue to add each colour, weaving back and forth to create the arch of the rainbow.
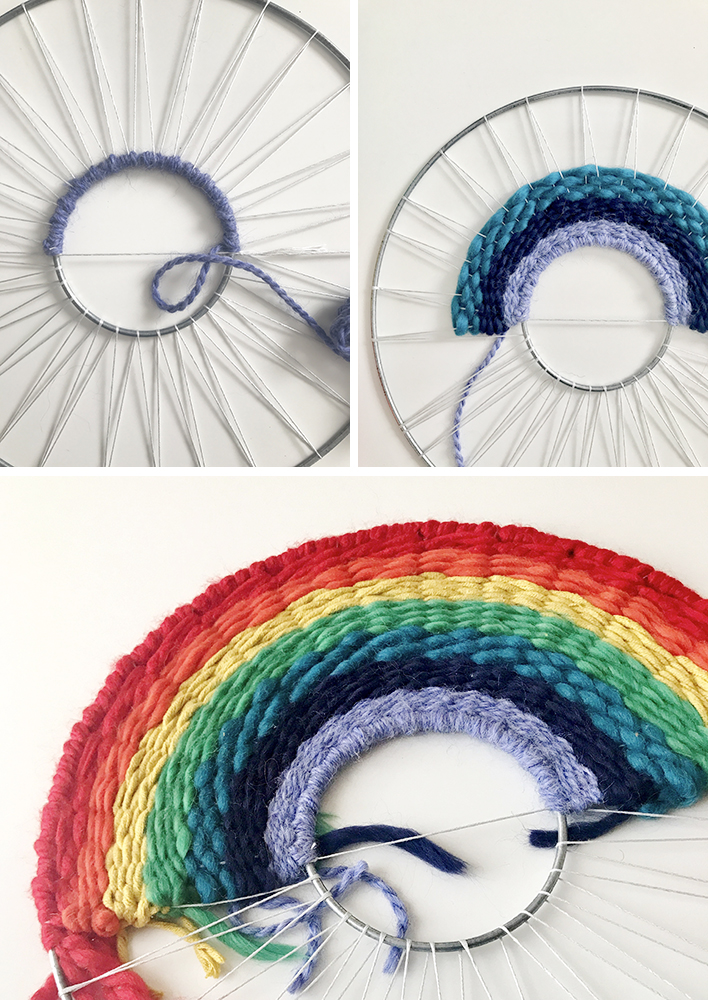
Finish by wrapping the outer hoop in red yarn, in the same way that you wrapped the inner hoop in violet yarn. Tie the end to the hoop.
Turn the weaving over and tie the tail ends together in double knots. For example the violet tail will be tied together with the indigo tail next to it. Don’t cut the tails.
Weave the cloud
Take a length of wool roving, about a metre long and tie the end to one of the embroidery thread ‘spokes’.
Begin to randomly weave the roving amongst the spokes. Don’t pull it tight – leave loops poking up so it has a fluffy cloud-like texture. Weave in and out and around the spokes, filling up a section at a time.
When you run out of roving leave the end – about 10cm – hanging at the back of the weaving. Add another piece of roving, tying it to a spoke to start it off.
Make sure you cover the bottom ends of the rainbow and fill up the space below the thread that dissects the inner hoop.
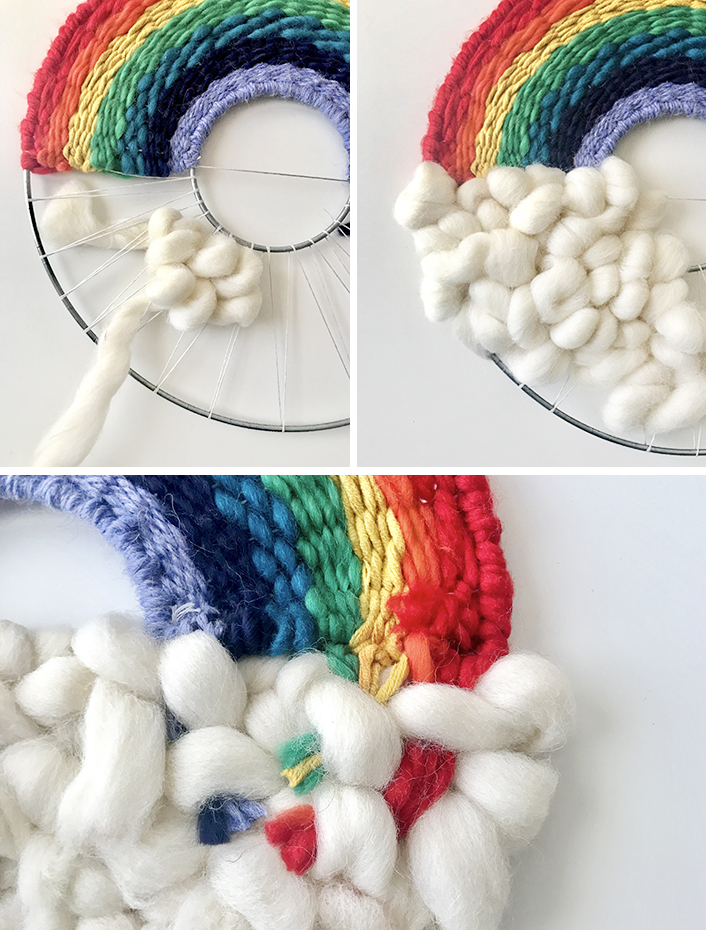
When the cloud is full and complete turn the weaving over (photo above) and weave the coloured yarn ends through the roving cloud. Cut off any excess yarn.
Weave the tail ends of the roving into the roving cloud to hide and secure them.
Add the raindrops
Lay the felt balls out on the table and arrange them in 5 lines.
Thread a standard needle with sewing thread and tie a knot in the end.
Starting with the centre row of felt balls, thread them onto the needle and thread, pushing the first ball all the way down to the knot.
Space out the felt balls along the thread then tie the end onto the outer hoop with a double knot.
Repeat with the remaining four rows of felt balls.
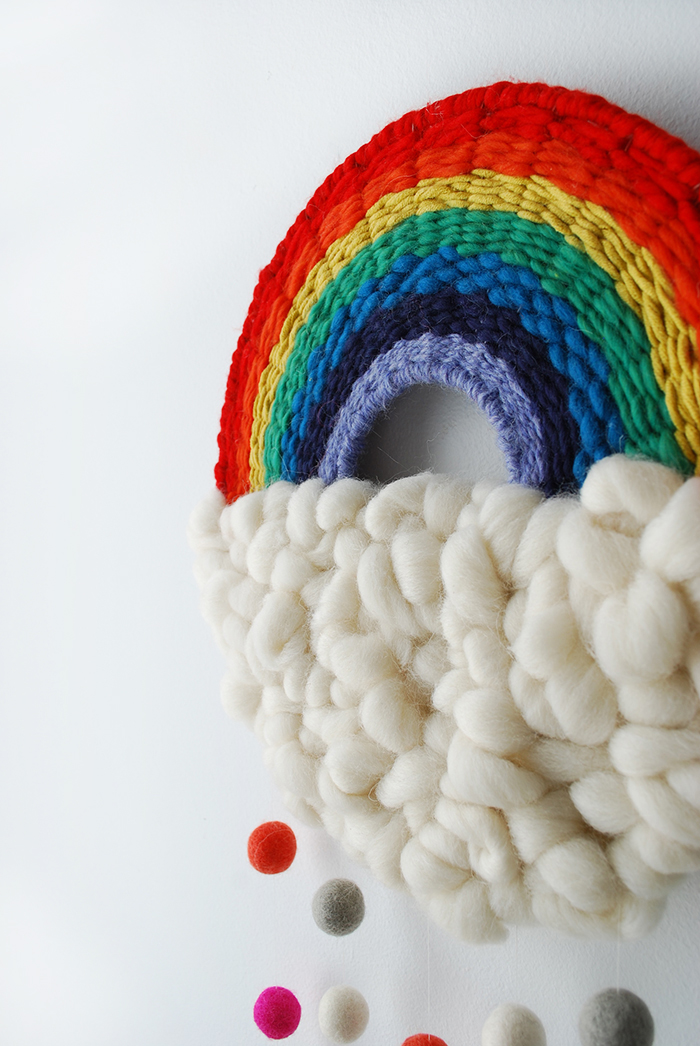
Hang your rainbow weaving and admire your handiwork.

Looking for more rainbow crafts? Take a look at my rainbow pillow tutorial. There are lots of other crafts for children’s rooms in the craft and DIY archives, including a pom pom solar system mobile, dream catcher, a raindrop softie, and much more!
If you make this or any other of my craft and DIY projects I’d love to see them! Please share on Instagram and tag me @we_are_scout_lisa and use #wearescoutcraft